Tips and tricks: Improving image quality with modern digital cameras used on microscopes
Precision focusing with the magnifying function on the camera screen
The process of focusing is of key importance in microscopy as it determines the clarity and quality of the image obtained. As a rule, microscope specimens have a certain thickness. For this reason, there are multiple possible focal planes.
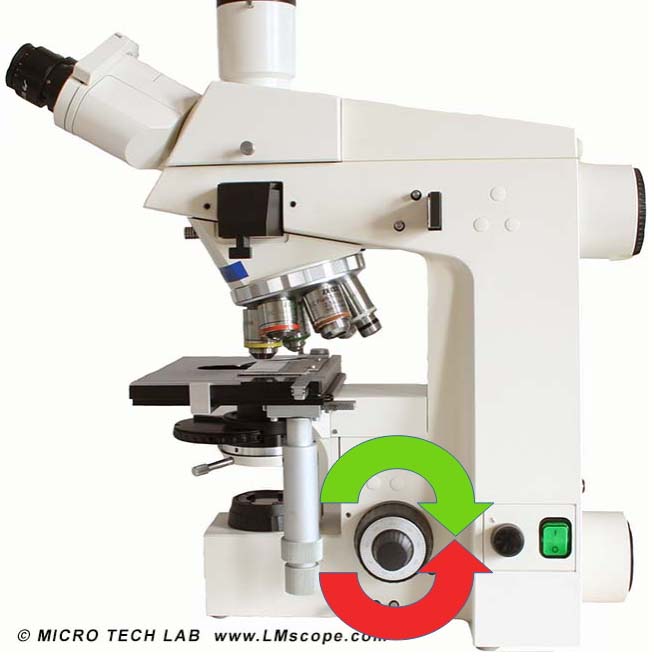
When a new specimen is placed on the stage, the first step is to use the coarse and fine focus knobs with lower magnification lenses to bring the specimen into focus while observing it through the eyepieces at low magnification levels.
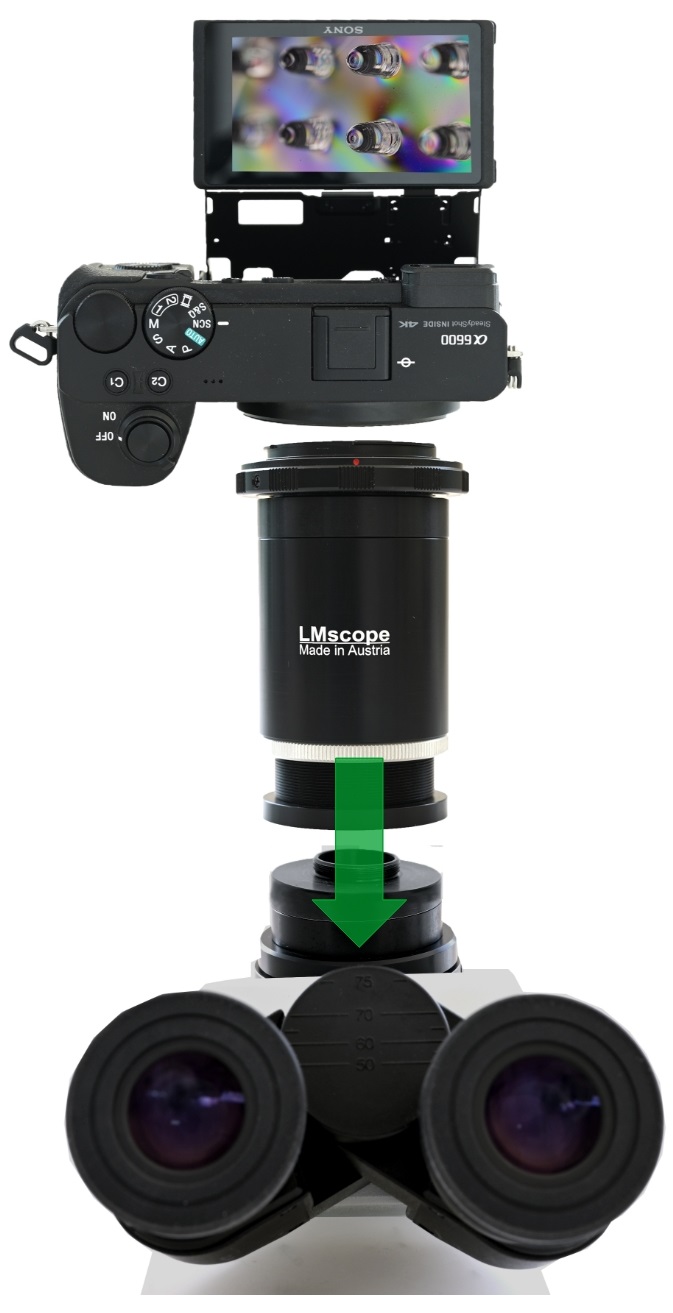
Once the focus observed through the eyepieces is fine-tuned, you turn to the camera attached to the microscope. Using the Live View image displayed on the camera screen, an external monitor or a computer screen tethered to the camera, all areas of the image can be checked for sharpness.
To get the point of best focus for a specific detail, we recommend using the magnifying function of the camera or the software you’re using. This is the only method for obtaining a perfectly focused image.
Relying only on the camera display or external monitor without using the magnifying function might deceive you into believing that the image is correctly focused when, in fact, it lacks the necessary detail and sharpness upon closer inspection.
Since the camera screen or the monitor used for displaying the Live View image has fewer pixels than the camera’s image sensor, there is a risk that the desired focal plane will not be brought into exact focus or will not be displayed correctly on the camera screen or monitor.
Below, we provide a brief description of the focusing process when using a digital camera on a microscope:
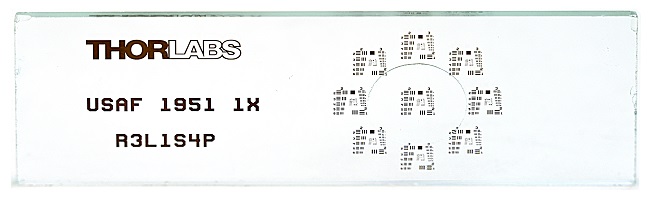
For the initial calibration or optimisation of the microscope or camera system, it is advisable to use flat, geometrically simple objects. These specimens, due to their small thickness, have fewer possible focal planes, which facilitates the focusing process. The best results can be achieved with test targets specifically designed for microscopy.
Laboratory microscope: Start with a low magnification objective lens (5x or 10x) to bring your specimen into basic focus.
Stereo microscope: Select the lowest zoom setting available.
Now look through both eyepieces and use the coarse and fine focus knobs to bring the image into focus.
Next, look at the camera screen or the external monitor/computer monitor and try to adjust the Live View image until you get the point of best focus.
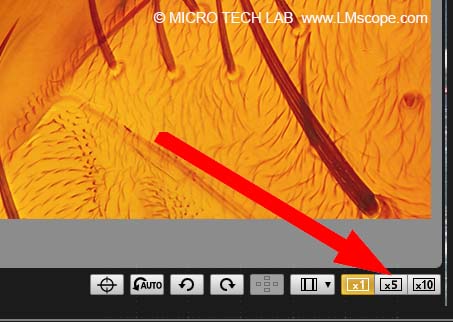
Then, activate the magnifying function (5x/10x/15x) of the camera or tethering software you’re using and focus precisely on the desired detail in the live image.
This step should require only minimal adjustments using the microscope’s fine focus knob.
On many cameras, the magnification level can also be selected using a joystick or directional buttons on the screen.
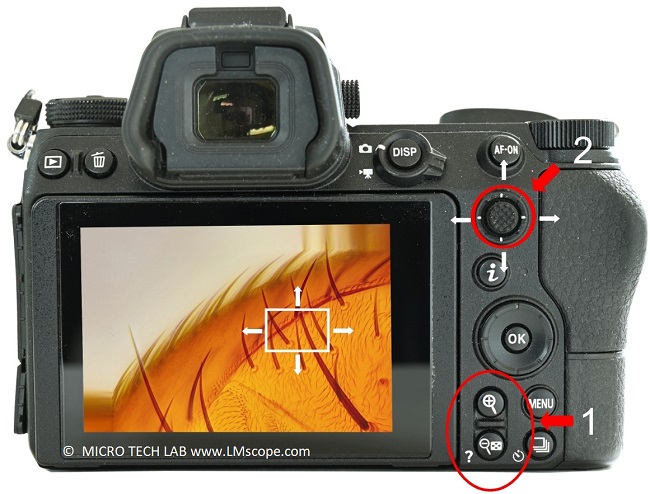
Upon confirmation, the selected area is magnified on the display, allowing for precise focusing on the desired detail. The magnified box makes it easier to see subtle changes in sharpness. Once the image is in sharp focus, you can release the shutter to take your picture.
To avoid motion blur, it is essential to either use a remote shutter release or to control the camera remotely from the computer. Motion blur is the most frequent reason why images are not optimally focused! Also, make sure to avoid any vibrations that could transfer to your microscope.
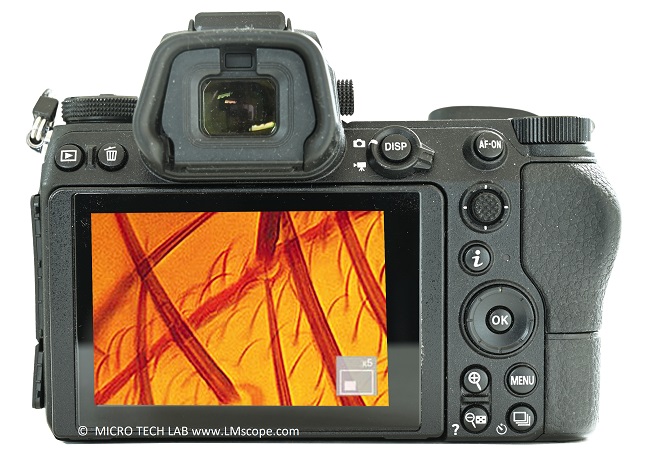
Image focus can be adjusted easily and efficiently using the camera’s control software, which enables the camera to be controlled remotely from a PC/Mac/tablet. This increases image quality and also improves workflow efficiency. In most cases, this software is available from the camera manufacturer (Nikon / Sony / Canon / Olympus).