

Powerful Sony system cameras on the microscope: remote capture (tethered shooting) with Live View
Sony Imaging Edge: a useful software suite for controlling Sony DSLR and system cameras remotely from a PC or Mac
The Imaging Edge software allows navigation of Sony’s current Alpha series cameras via PC or Mac – a very convenient tool since the ability to control the camera remotely is particularly important for the specialised areas of photography we are interested in: photomicro- and photomacrography.
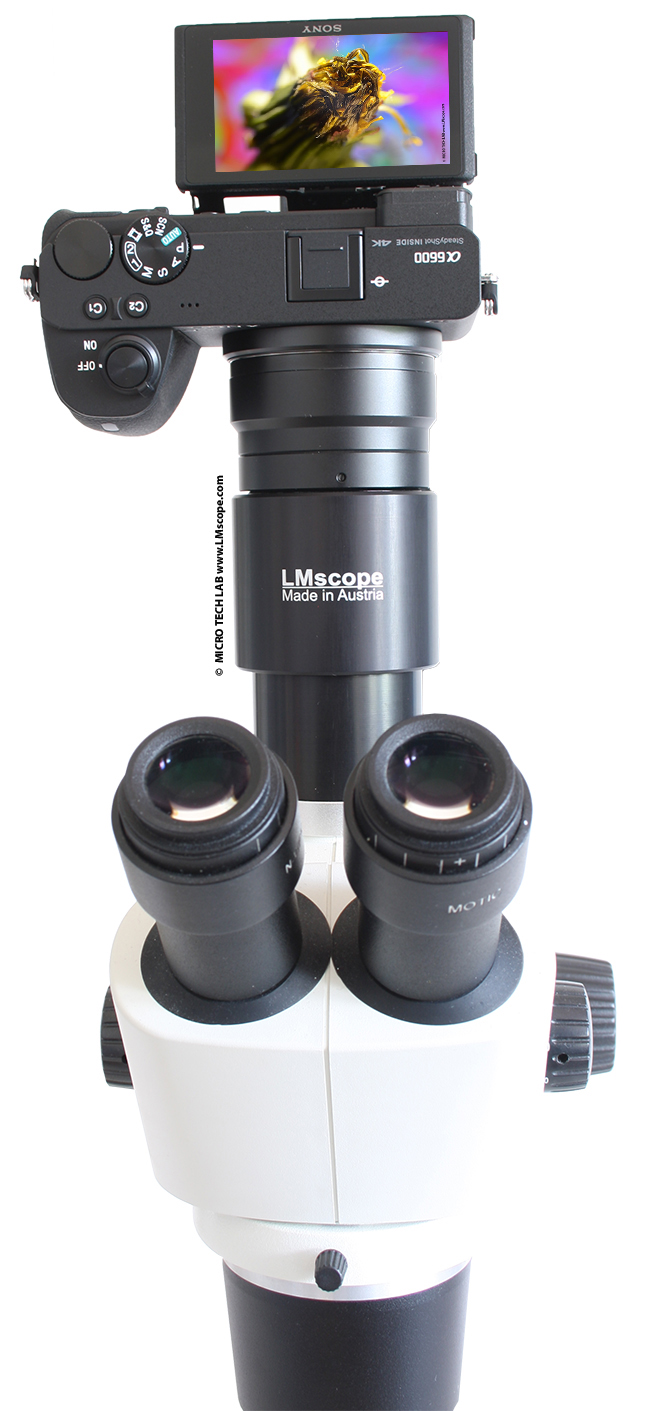
Sony’s mirrorless system cameras are among the best performers in the market. With our LM microscope adapters, they can be attached to a microscope in a few easy steps. Particularly outstanding features of these cameras are their superior image quality, ease of operation and excellent price-performance ratio.
Operating the camera via a PC or Mac is very convenient and ergonomic, especially when the camera is attached to the phototube of a microscope. The Live View image is displayed directly on the computer monitor and can be controlled and configured remotely. It just takes a mouse click to release the shutter, and the image captured can be stored directly on the PC’s hard drive or online in the cloud.
The connection for remote capture (tethered shooting) can either be wired (using a USB cable) or wireless via Wi-Fi/WLAN. Sony’s Imaging Edge software is a combination of three photography applications: “Remote”, “Viewer”, and “Edit“. It can be downloaded for free from the Sony website. This is a particular advantage if cameras are to be tethered to several computers.
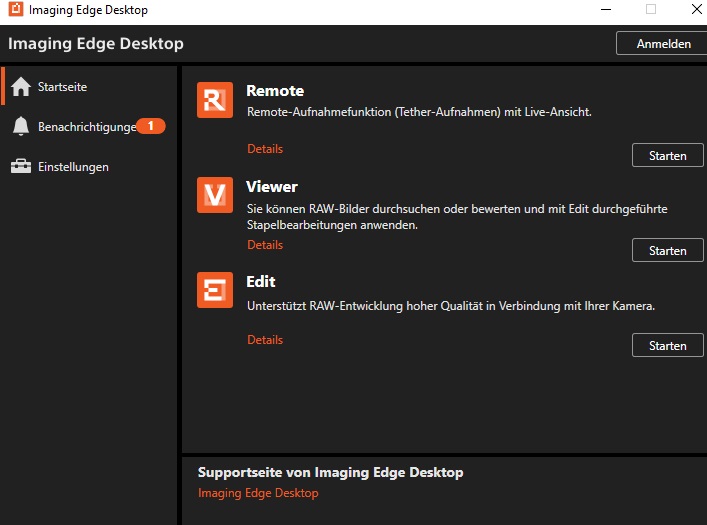
We downloaded version 3.1.00.01080. Other versions may be slightly different.
The test report below provides a step-by-step walkthrough of the settings that are most important in photomicrography.
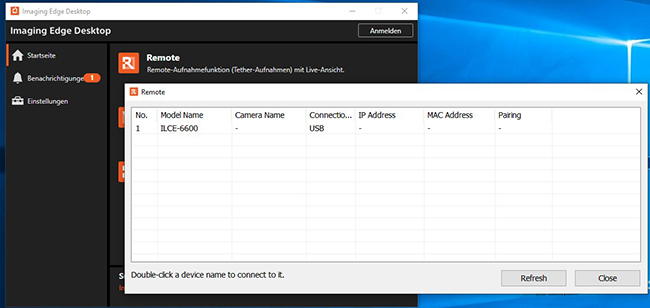
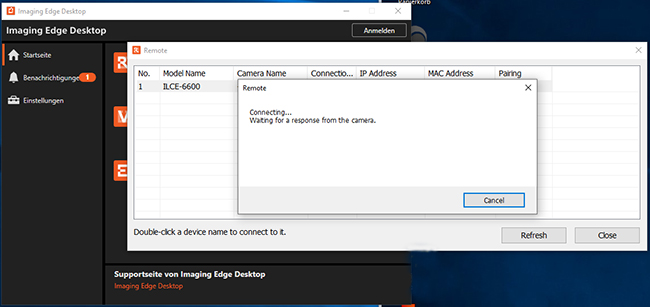
Once the program has launched, you can search for and select the camera you would like to use. We used a Sony Alpha 6600 for our test. In Imaging Edge, the camera is called “ILCE-6600”. Once selected, the camera is accessed and connected to the PC:
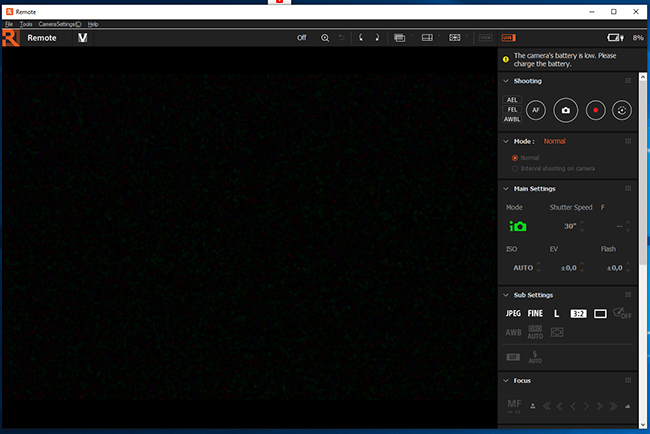
The “Imaging Remote” application starts:
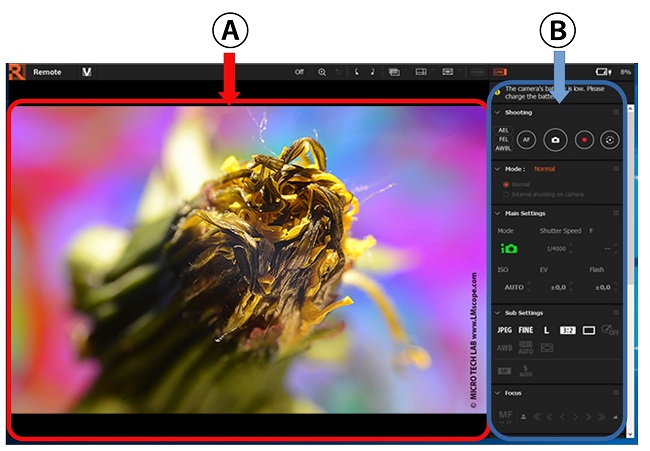
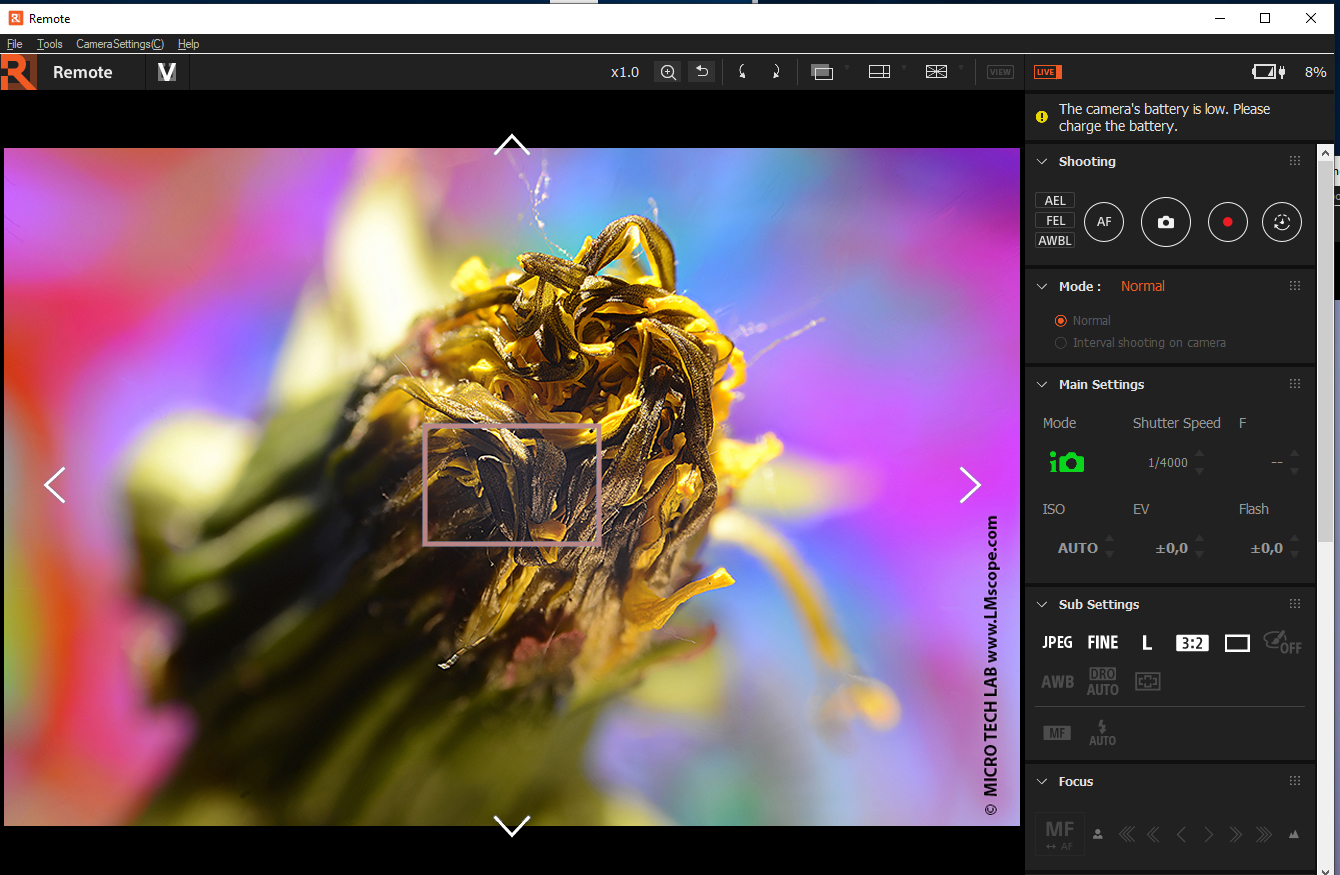
The Live View screen (A) and the operation panel (B) are displayed in the Remote window.
The Live View screen (A) shows the current view of the camera. The operation panel (B) provides basic shooting settings that are clearly laid out. The settings are applied to the camera immediately:
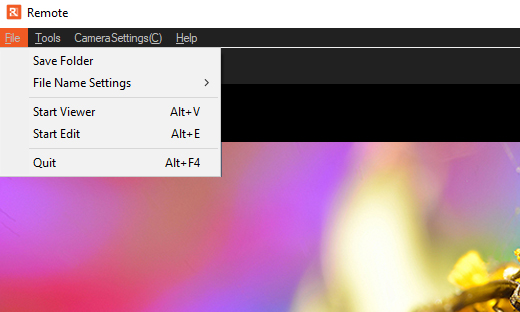
Menu tab overview
The other two components of the software suite – “Viewer” and “Edit” – can also be launched from the “File” menu tab.
The settings for the software and the camera can be adjusted in “Tools” and “Camera Settings”:
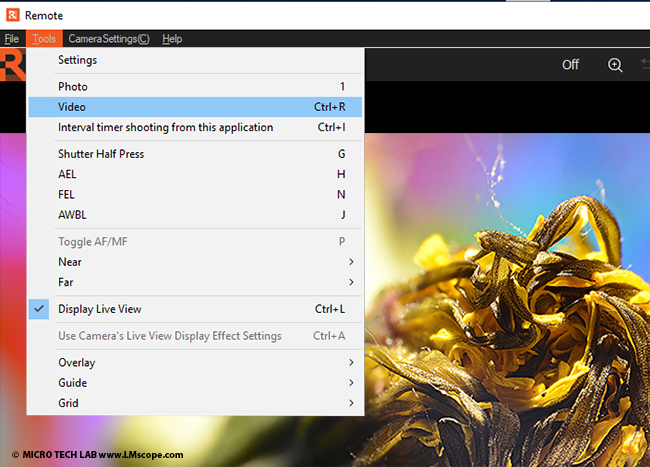
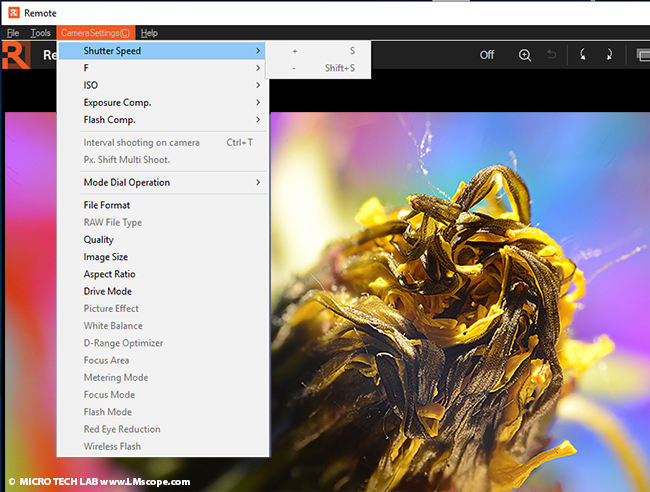
In addition to the menu tabs, the most important settings can also be adjusted by using the buttons on top of the Live View screen and from the operation panel.
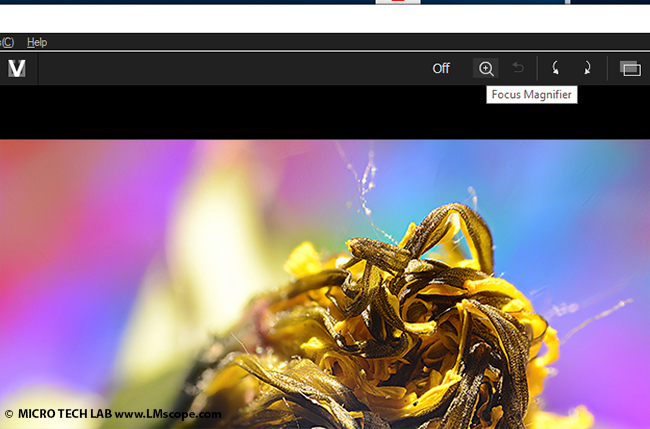
Overview of the settings on top of the Live View screen
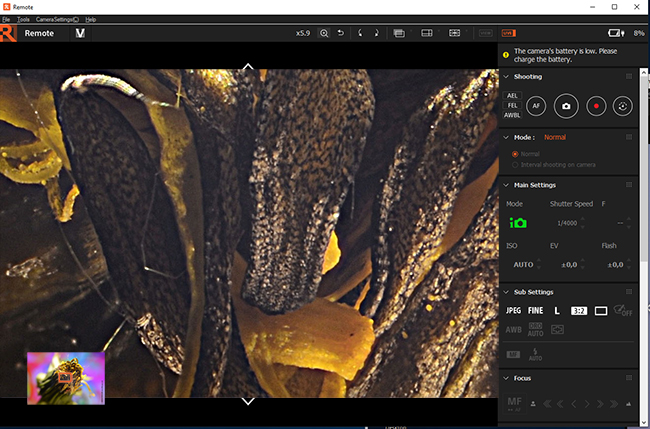
The focus magnifier is very important and useful for focussing the image:
 Shown in the photo: the image 5.9-times enlarged
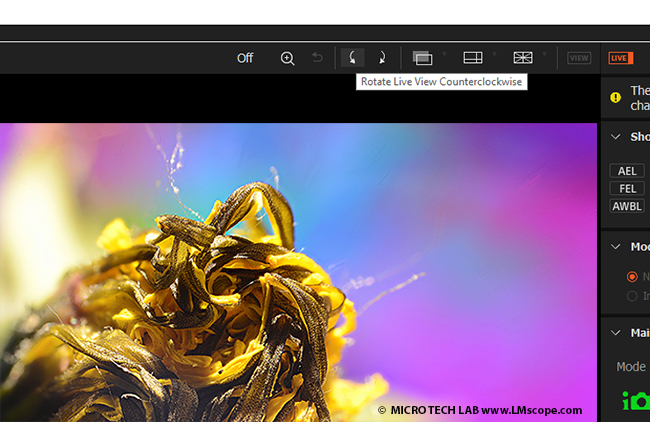
The Live View image can also be rotated.
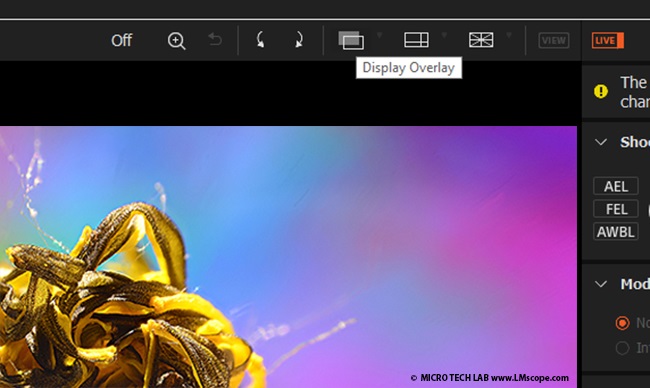
The overlay option is another convenient feature, which allows any object (e.g. a ruler or other scale marks) to be placed over the image displayed in the window. Overlay guide lines are also very useful in many cases.
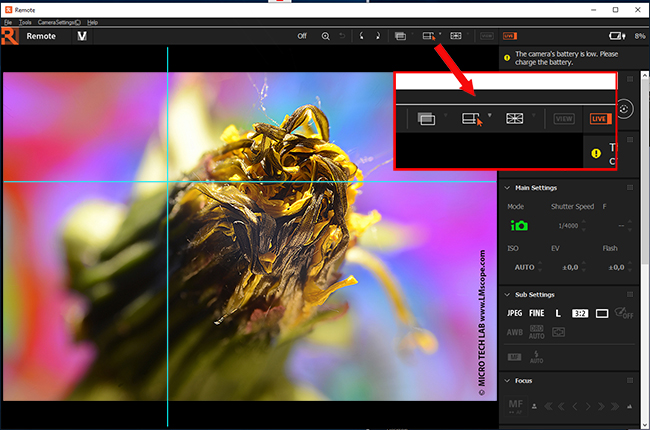
The grid option can be used to place gridlines over the image.
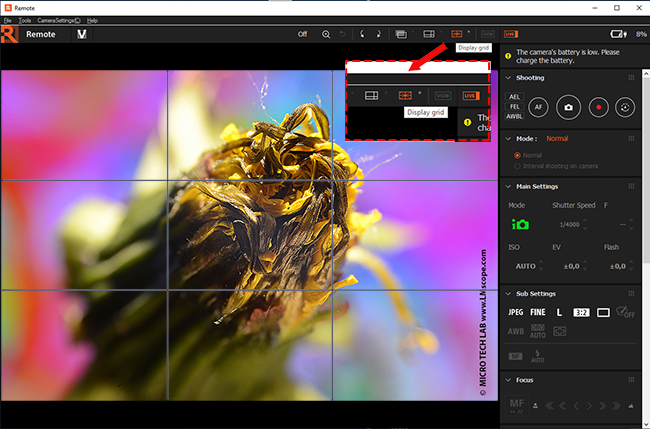
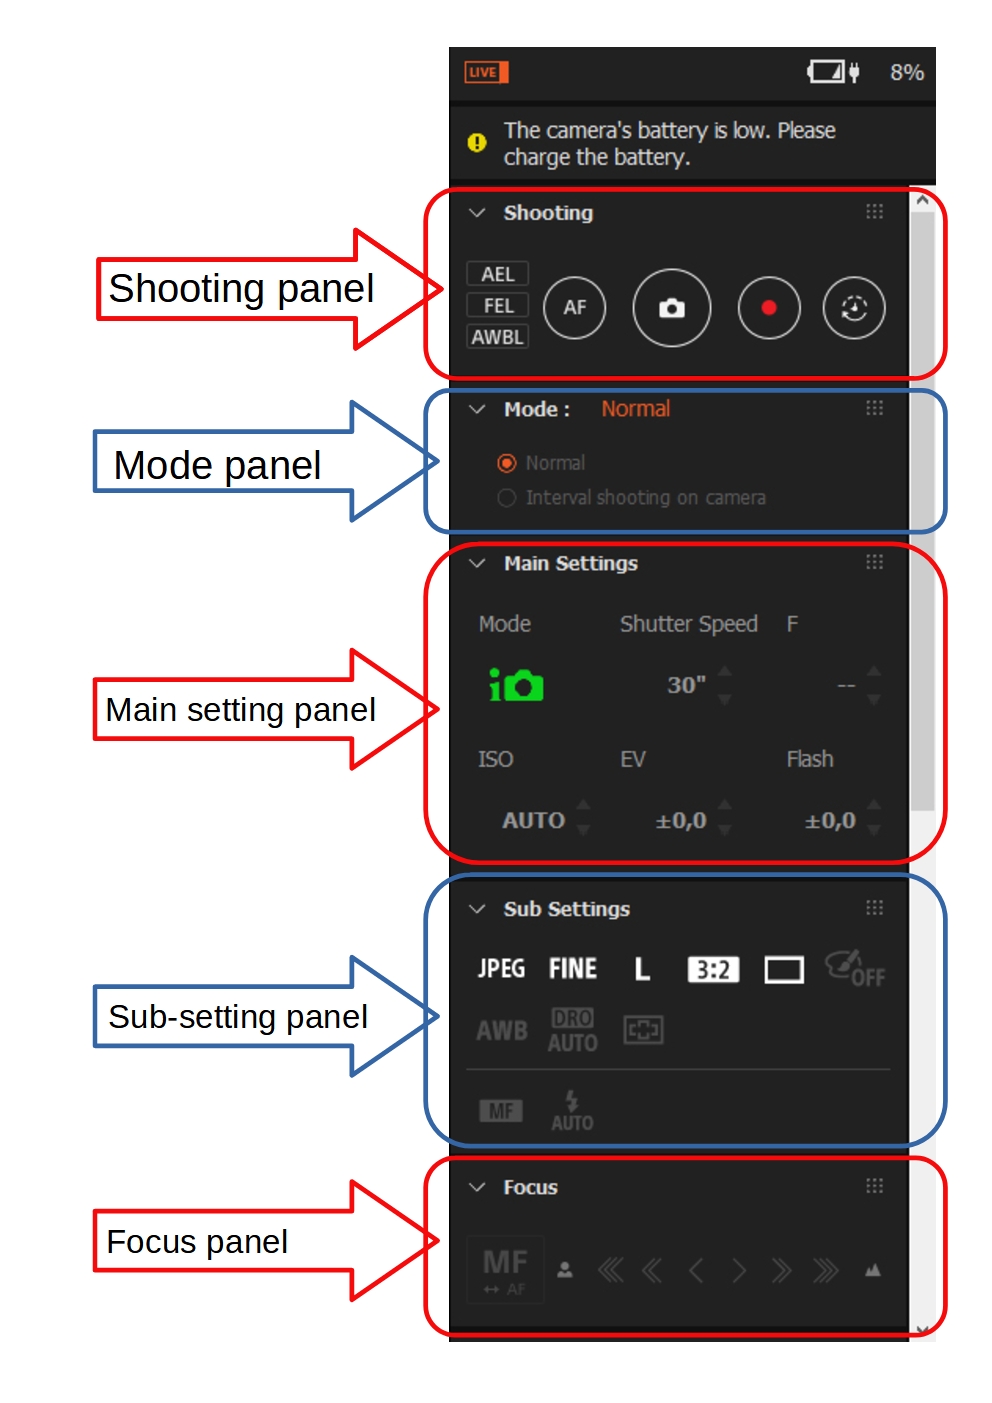
Operation panel overview
The operation panel is arranged into a number of groups:
1.) Shooting panel
The functions contained in this panel include the button for releasing the shutter and the movie button.
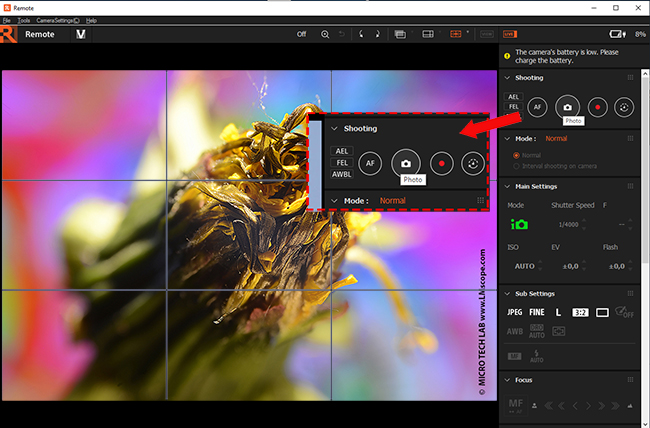
2.) Mode panel: to select different shooting modes
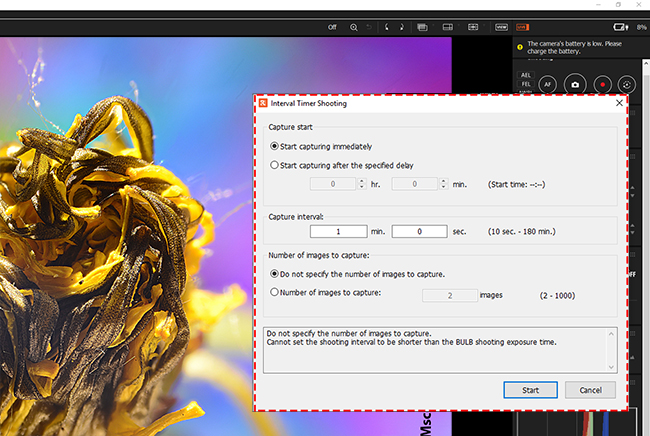
Interval timer shooting: We recommend pausing for one to two seconds after each capture, in order to avoid any unwanted motion blur. The camera’s focal-plane mechanical shutter that controls the exposure time causes only minimal camera movement. A focal-plane mechanical shutter is not required for taking photos of static specimens. The capture interval and the delay after each capture can be set in the Interval Timer Shooting menu.
3.) Main setting panel
The main setting panel contains the following settings:
- Shooting mode
- Shutter speed
- Aperture value
- ISO sensitivity
- Exposure compensation
- Flash compensation
4.) Sub-setting panel
This panel contains the settings that are particularly important for photomicrography:
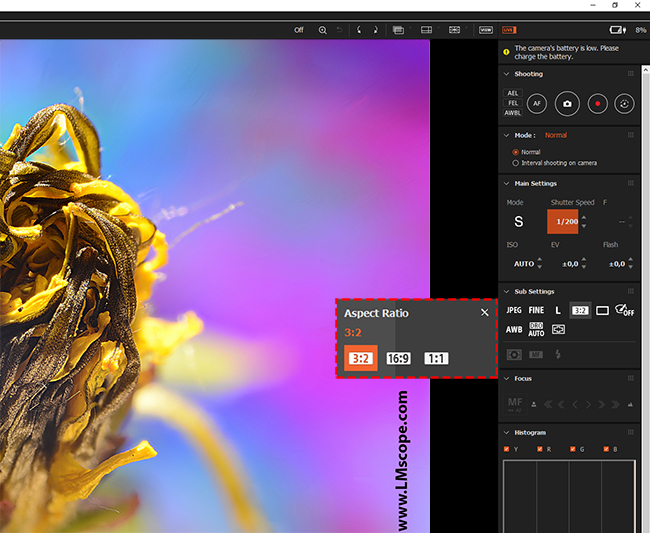
The file format and aspect ratio of the image to be captured can be changed at the touch of a button. Images can be saved in RAW, RAW-J and JPEG format.
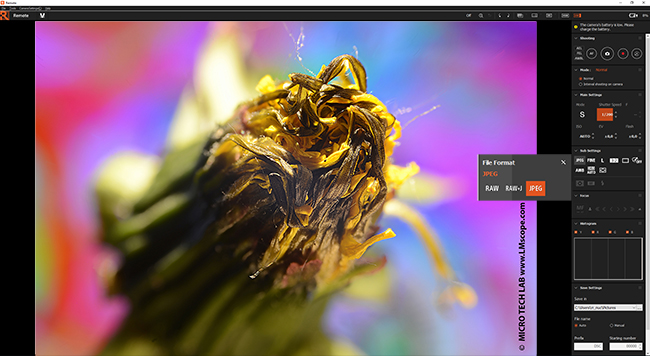
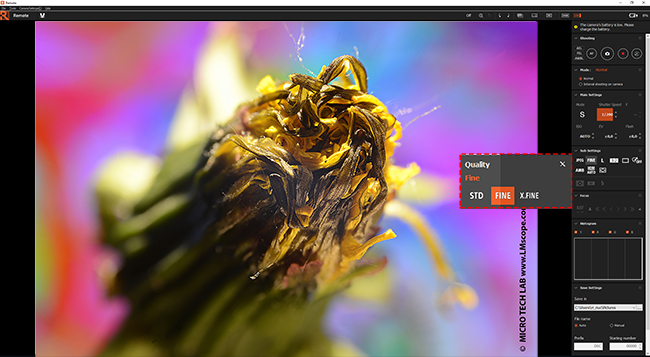
The image quality can also be defined:
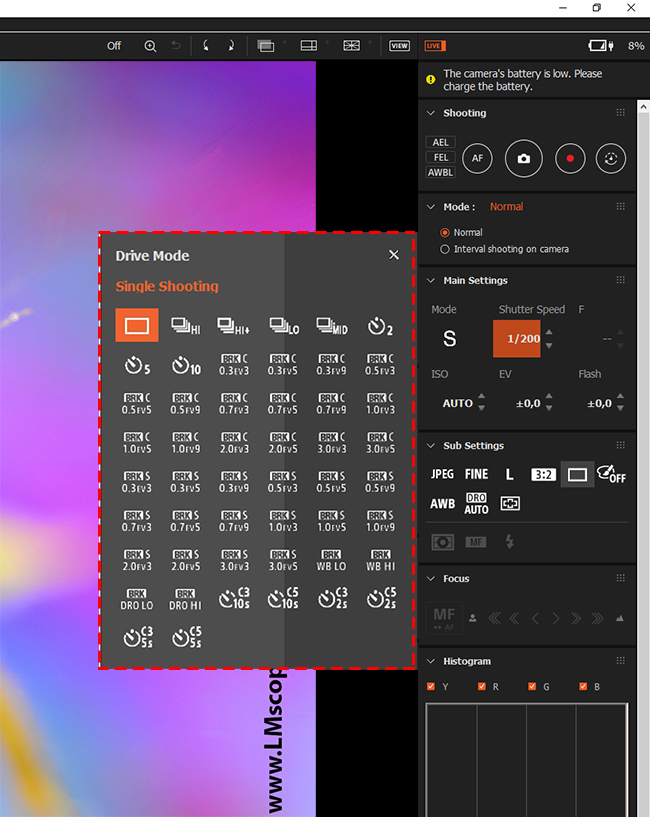
Single shooting / Continuous shooting / timer settings:
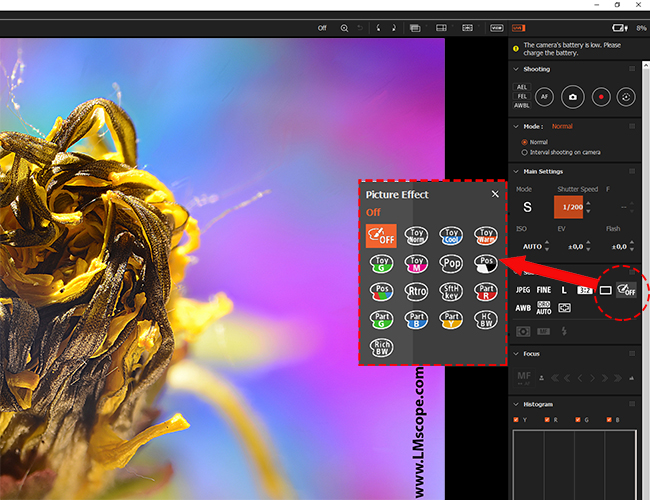
Picture effects:
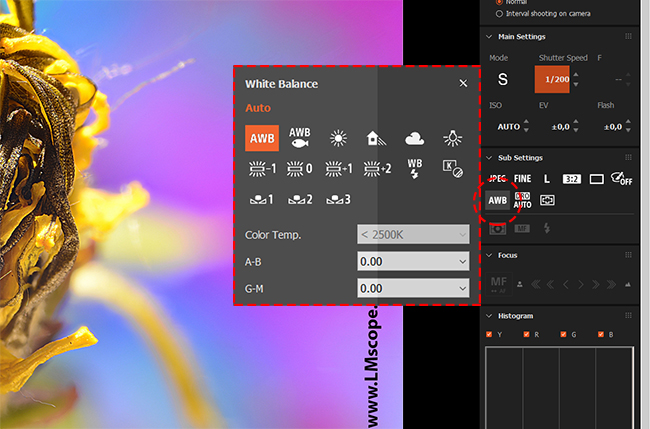
White balancing:
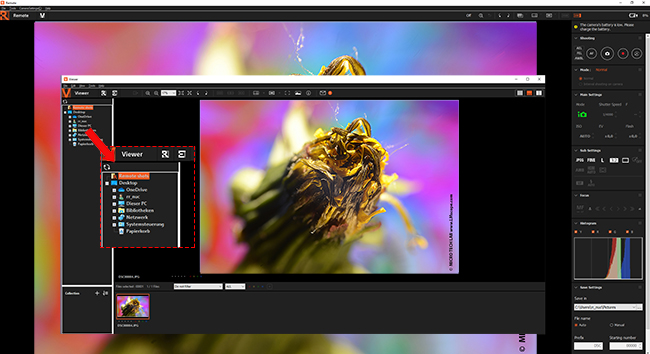
In the Imaging Edge Viewer, saved images can be opened, viewed and edited.
An overview of the supported devices is available on the following Sony website: https://support.d-imaging.sony.co.jp/app/imagingedge/en/devices/
Conclusion: For professional laboratory and studio work on the microscope, we recommend using the Sony software. It enables the camera to be comfortably and effortlessly controlled from the computer, which in turns produces a notable increase in image quality.
27.07.2021New LM Digital Adapter for: Sony Alpha 9 III / Sony Alpha 7R V / Sony Alpha 1 II / Sony Alpha 1 / Sony Alpha 9 II (ILCE-9M2) / Sony FX3 Cinema Line / Sony Alpha 9 / Sony Alpha 7R IV / Sony Alpha 7S II / Sony Alpha 7S III / Sony Alpha 7R III / Sony Alpha 7R II / Sony Alpha 7C / Sony Alpha 7S / Sony Alpha 7III / Sony Alpha 6700 / Sony Alpha 6600 / Sony Alpha 6400 / Sony Alpha 6100 / Sony ZV-E10 / Sony Alpha 6300 / Sony Alpha 6500 / Sony Alpha 99 II (SLT-A99 II) / Sony Alpha 77 II / Sony Alpha 7R / Sony Alpha 7 / Sony Alpha 68 / Sony Alpha 99 (SLT-A99) / Sony Alpha 7II / Sony Alpha 6000 / Sony Alpha 77V / Sony Alpha 580 / Sony Alpha 5100 / Sony Alpha 5000 / Sony Alpha 55 / Sony Alpha 33 / Sony Alpha 35 / Sony NEX-7 / Sony NEX-6 / Sony Alpha 57 / Sony Alpha 37 / Sony NEX-5N / Sony NEX-C3 / Sony NEX-F3 / Sony NEX-5 / Sony NEX-3 / Sony Alpha 65V / Sony Alpha 700 / Sony Alpha 850 / Sony Alpha 900 / Sony NEX VG10 / Sony Alpha 3000 / Sony Alpha 450 / Sony Alpha 560 / Sony DSC-HX9V / Sony DSC-HX100V / Sony DSC-WX7 / Sony DSC-WX10 / Sony DSC-H70 / Sony DSC-HX7V / Sony DSC-TX10 / Sony DSC-TX100V / Sony HDR-CX700 / Sony DSC-HX7V / Sony DSC-W570 / Sony DSC-J10 / Sony DSC-T110 / Sony Alpha 380 / Sony Alpha 550 / Sony Alpha 500 / Sony Cyber-shot DSC-H55 / Sony Cyber-shot DSC-W320 / Sony Cyber-shot DSC-W350 / Sony Cyber-shot DSC-W360 / Sony Cyber-shot DSC-W380 / Sony Cyber-shot DSC-T99 / Sony DSC-W530 / Sony Cyber-shot DSC-W300 / Sony DSC-T90 / Sony DSC-T900 / Sony DSC-W230 / Sony DSC-W270 / Sony DSC-W290 / Sony DSC-W210 / Sony DSC-W220 / Sony Cyber-shot DSC-W190 / Sony Cyber-shot DSC-W275 / Sony Cyber-shot DSC-W310 / Sony Cyber-shot DSC-WX5 / Sony Cyber-shot DSC-TX9 / Sony HDR-CX360 / Sony DSC-W510 / Sony Cyber-shot DSC-W170 / Sony Cyber-shot DSC-T77 / Sony Alpha 350 / Sony Cyber-shot DSC-T300 / Sony Cyber-shot DSC-T500 / Sony Cyber-shot DSC-T700 / Sony DSC-H20 / Sony DSC-S930 / Sony DSC-S950 /