

Setting up and editing a database of video sequences by using the video compression system DivX®5
Video sequences need a lot of disc
space
if they are not compressed: for one hour in full DV quality you need
approx. 13 GB. Depending on the range of application and the desired compatibliliy
several different compression modes are available. The most common
video compression modes are: MPEG1, MPEG2, MPEG4, mov (QUICKTIME®:) and VHS VideoCD. However,
the compression system that offers the best proportion between the
required
disc space and image quality is momentarily the DivX® Networks Codec with free download in the
internet.
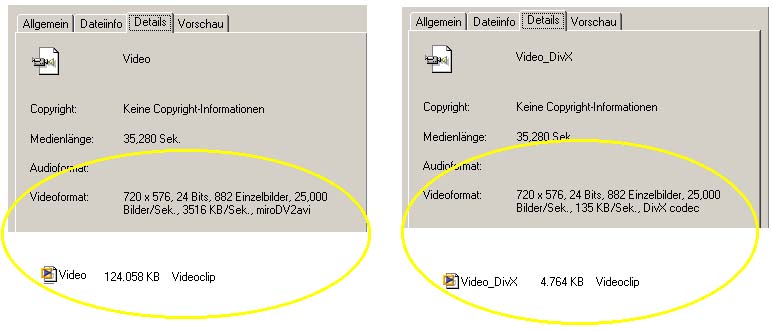
This DivX®-Codec enables recording a 90 min video on a normal recordable CD (700 MB) and therefore is the best suited system for setting up a database for long camcorder videos. So a 16 min video sequence in full DV quality (resolution of 720x574) needs approx. 3 GB without compression, whereas after compression it occupies just 200 MB disc space. The compressed video is 20 times smaller than the original file.
To be able to play the
compressed video sequences (and generally for all actions in digital
video editing) it is recommendable to use a fast CPU.
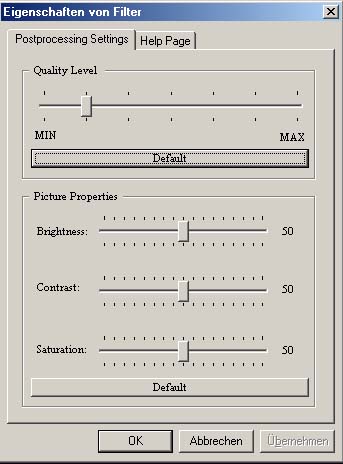
In the playback mode, the DivX®
Codec offers the so-called Postprocessing
Setting option
which can be adjusted in the player (Media
Player® etc.). This function enables
the rendering of each single picture while playing the video and so
improves
the image quality. A wrong (too high) postprocessing level causes a
discontinuous
image sequence.
To be able to play back the video
sequences, the DIVX® Codec has
to be installed on the computer.
What do you need for
video compression in DivX®?
| 1. DivX® Codec, at present: | Divx® Codec 5 | |
| 2. Video cutting software, like: | Pinnacle Studio 7 ®: |  |
| or Virtual Dub (Freeware) |  |
|
| 3. Player to play the videos: | e.g. Windows Media Player ® |  |
First steps for
compression with Virtual Dub
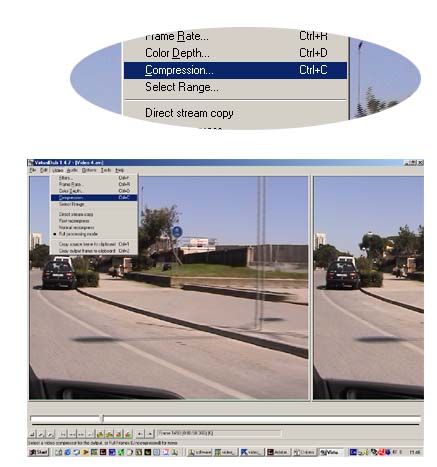  |
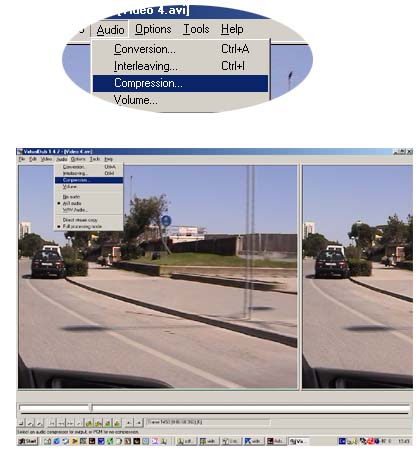
After opening the video with the Open Video File Button, choose the compression
Codec DivX®. Click then onto the Configure
Button on the right side. |
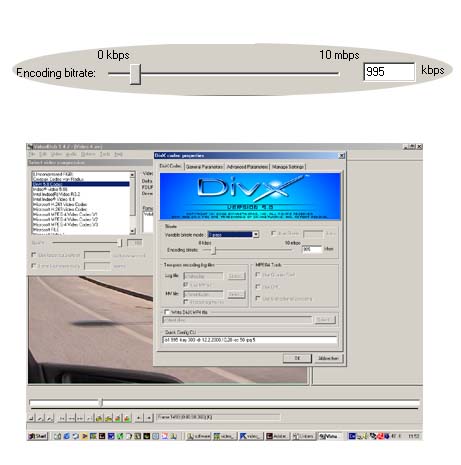 |
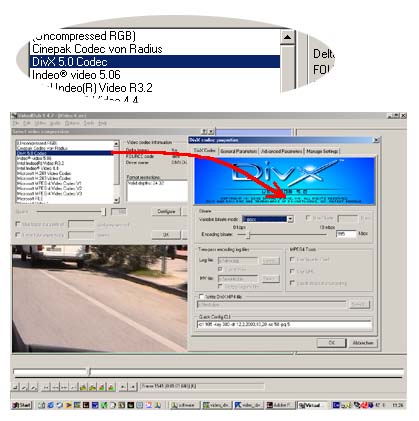
Now adjust the DivX® Codec. It offers a lot of adjustment
possibilities to cover a large range of applications. For beginners,
the easiest possibility is to choose "1 pass", to adjust the encoding
bitrate between 700 and 1000 kbps and not to change all the other
options. All adjustments have a great influence on the image quality
and on the required disc space
which makes it possible to find out the best individual adjustments and
filter options by trying out. |
 |
In equivalence to the video
codec you can choose the audio codec at will. At the moment MP3 or the
Lame Codec are the most efficient codecs. |
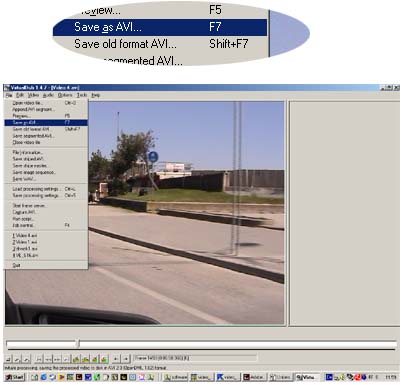 |
Rename your video sequence and
press the "Save"-button. |
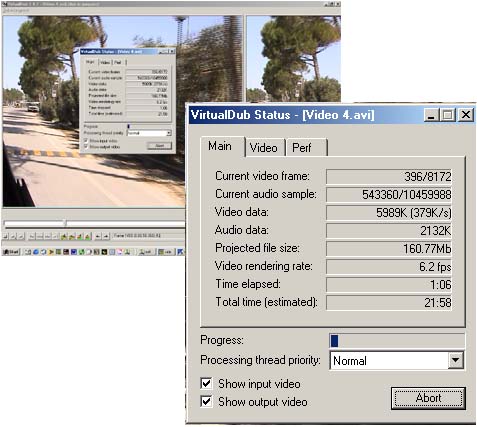 |
Now the computer starts encoding
the video in DivX®. The status
window of Virtual Dub shows all information concerning progress,
projected file size (Mb), rendering rate (fps = frames per second) and
the estimated total time. Used computer: Notebook Gericom®: Webboy PIII 1000 , Win ME® |
 |
Using DV camcorders and digital cameras in connection with the LM digital adapter in microscop |