

Harness the capabilities of Canon’s EOS Utility software for microscopy: use Live View for remote capture and control of Canon EOS cameras via PC or Mac
Canon EOS digital SLRs and mirrorless system cameras are powerhouse tools that excel when used as microscope cameras. Equipped with large, high-quality sensors (APS-C or full-frame), these cameras capture an extensive dynamic range and are exceptionally light sensitive. For this reason, Canon EOS cameras deliver considerably better image quality than comparable C-mount microscope cameras.
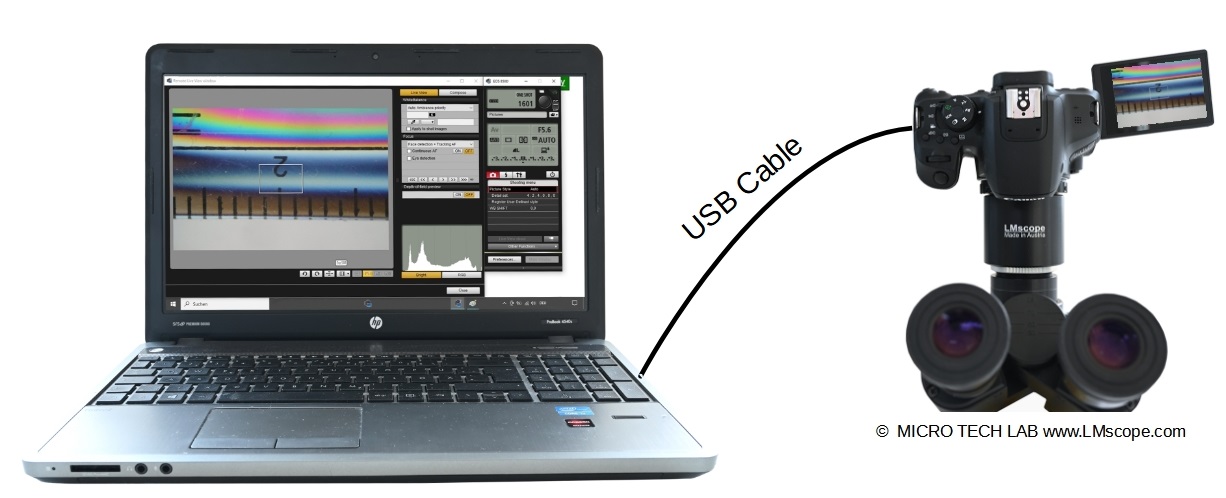
Canon EOS cameras can be easily connected to a computer using a USB cable, and with the EOS Utility software, the camera can be controlled remotely while viewing the Live View image on the computer. The Live View image can also be displayed on a large monitor, which allows flexible viewing and precise control of the image focus. EOS Utility also includes a magnification feature to bring out the smallest microscopic details in the image. A number of other camera settings, such as exposure time, ISO or white balance, can be adjusted with just a few clicks. Once the image is perfectly fine-tuned on the screen, the shutter can be released with the click of a button. After the shot has been taken, the image is transferred directly to the computer’s hard drive for further processing.
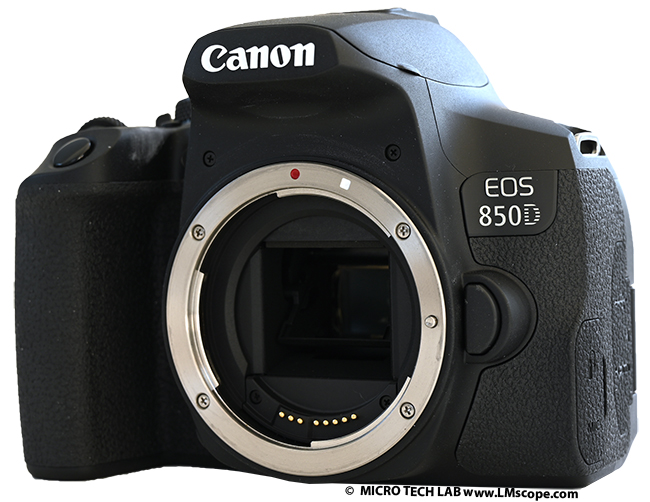
Below, we are illustrating the features of EOS Utility using the Canon EOS 850D SLR as an example. However, the software can be used with any camera of Canon’s EOS lineup.
The Canon EOS Utility software is available for free with the purchase of a Canon SLR or mirrorless system camera. The software is included in the camera price and can be downloaded from the Canon website. The ability to control the camera remotely is a significant advantage in the specialised area of photography we are interested in: taking microscope or macroscope images. Due to the camera’s inconvenient positioning, attached to the phototube or eyepiece tube, reaching its control buttons can be quite a challenge. There is also a risk of camera shake when the camera is operated manually. With EOS Utility, the camera can be efficiently controlled from the computer. The image output can be conveniently viewed on a large screen, and you can also adjust a number of settings and release the shutter (see above and below).
After downloading the latest version of the software, the camera is connected to the computer via the USB port. This ensures a stable connection and facilitates high-speed data transfer. If your camera is Wi-Fi enabled, you can connect it to your computer wirelessly. The software is now ready to start and will automatically scan for and connect to the camera.
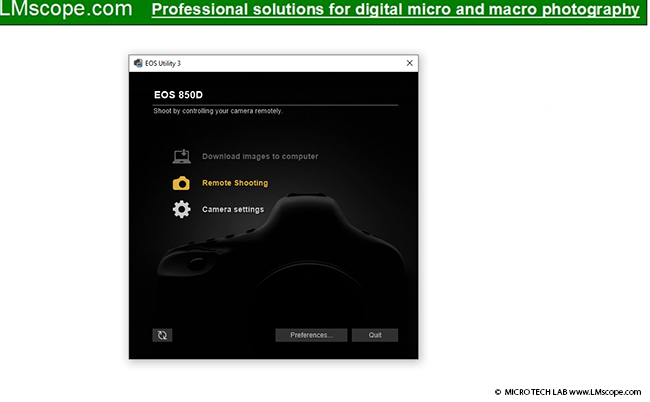
In the startup window, there are three options to choose from:
• Download images to computer
• Remote shooting
• Camera settings
We select the “Remote shooting” option to get to the Live View display.
As shown below, the screen is divided into two areas: the Live View window (A) and the operation panel (B). The operation panel provides basic shooting settings that are applied to the camera immediately.
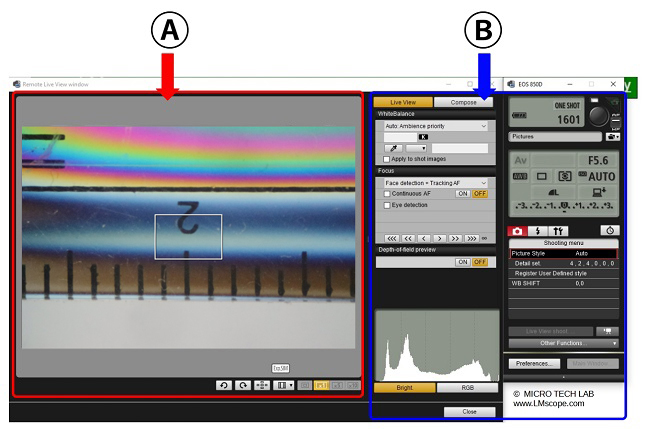
The magnifying function is located at the bottom of the Live View window (A) and offers three zoom levels – 1x, 5x and 10x. Please use this function to focus the microscope image.
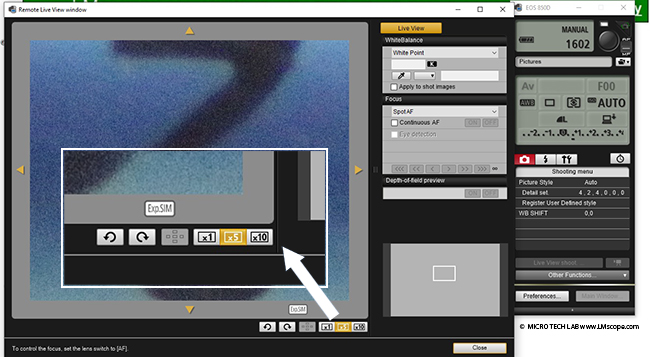
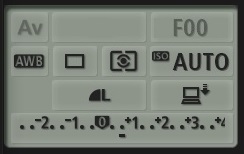
At the top left of the operation panel (B), Live View mode is selected. In the settings palette (far right), you can adjust many of the basic camera settings:
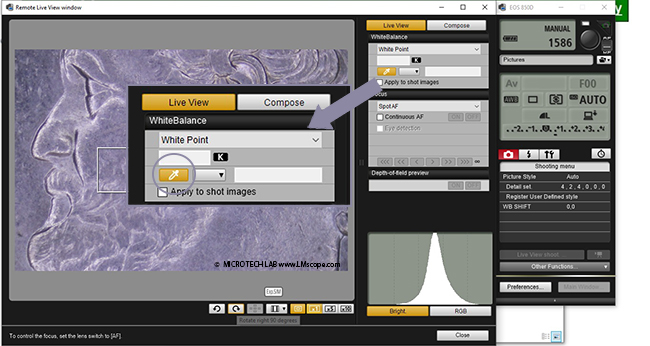
1.) White balancing
The eyedropper tool is a quick and easy way to adjust the white balance. In Live View, find an area in your image that is white. Click that spot with the eyedropper tool, which will define it as “white”. The software will then automatically adjust the white balance based on the area you selected. Alternatively, different lighting conditions (daylight, artificial light, etc.) can be selected.
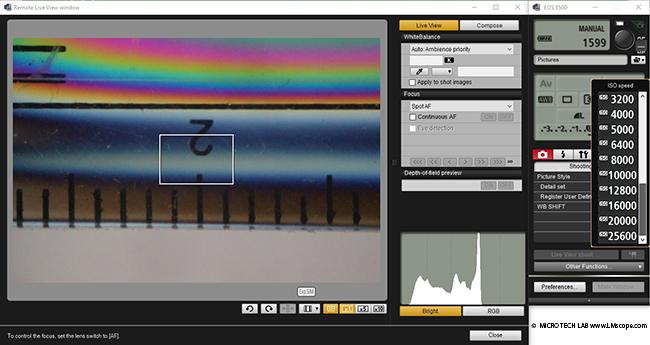
2.) ISO speed
The Canon EOS 850D has an auto ISO range of 400 to 25,600, which can also be set using the EOS Utility software.
3.) Exposure
Use the “Exposure comp/AEB” setting to adjust the exposure of your image. By default, exposure compensation can be adjusted up to +/-5 EV or more in 1/3 stop increments.
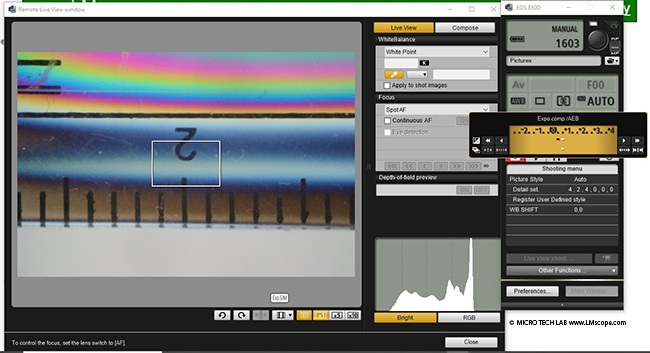
Another option is “AEB” shooting. AEB stands for “Auto Exposure Bracketing”. Auto exposure bracketing is a process where the camera automatically takes a sequence of images with different exposure values.
4.) Preferences
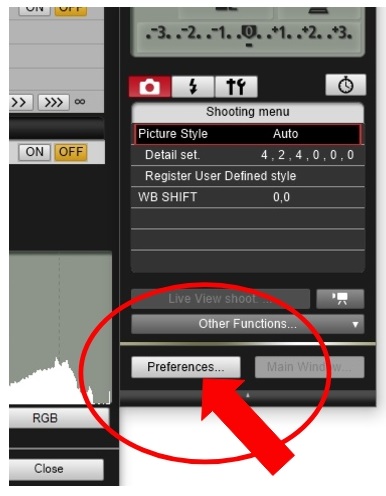
A number of important basic settings can be defined in the “Preferences” menu item:
Image saving location
One of the big advantages of the software is that the images can be saved directly to the computer’s hard drive in full resolution. Available options are: save to computer only, save to camera memory card only or save to computer and camera memory card. The image save format (RAW, JPEG) can also be selected.
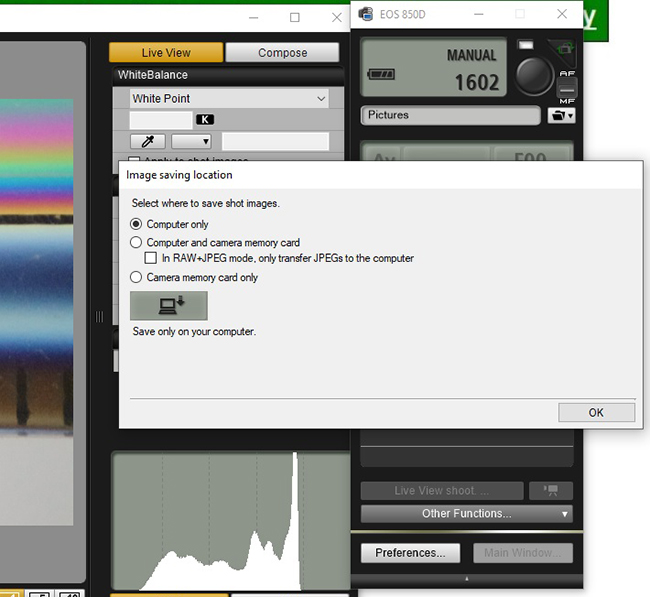
The destination on the computer where the images will be stored can be defined and selected directly.

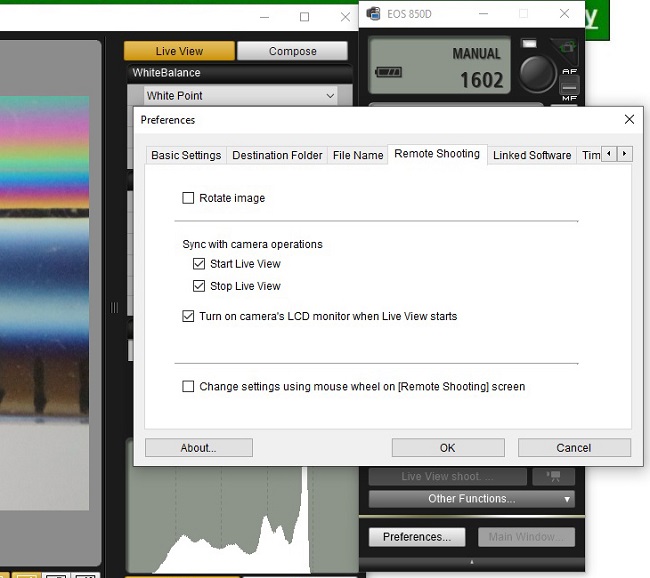
Under the “Remote Shooting” menu item, you can rotate the image and link camera operation with display/closing of the Live View window (i.e. specify whether the camera’s monitor should remain switched on during remote control from the computer).
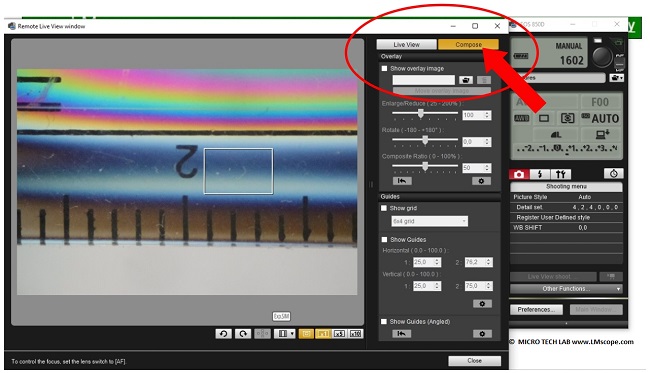
The “Compose” tab is located at the top right, next to the “Live View” tab. It can be used to set the desired image quality. The overlay option is another convenient feature, which allows any object (e.g. a ruler) to be placed over the image displayed in the window. The grid option can be used to place gridlines over the image.
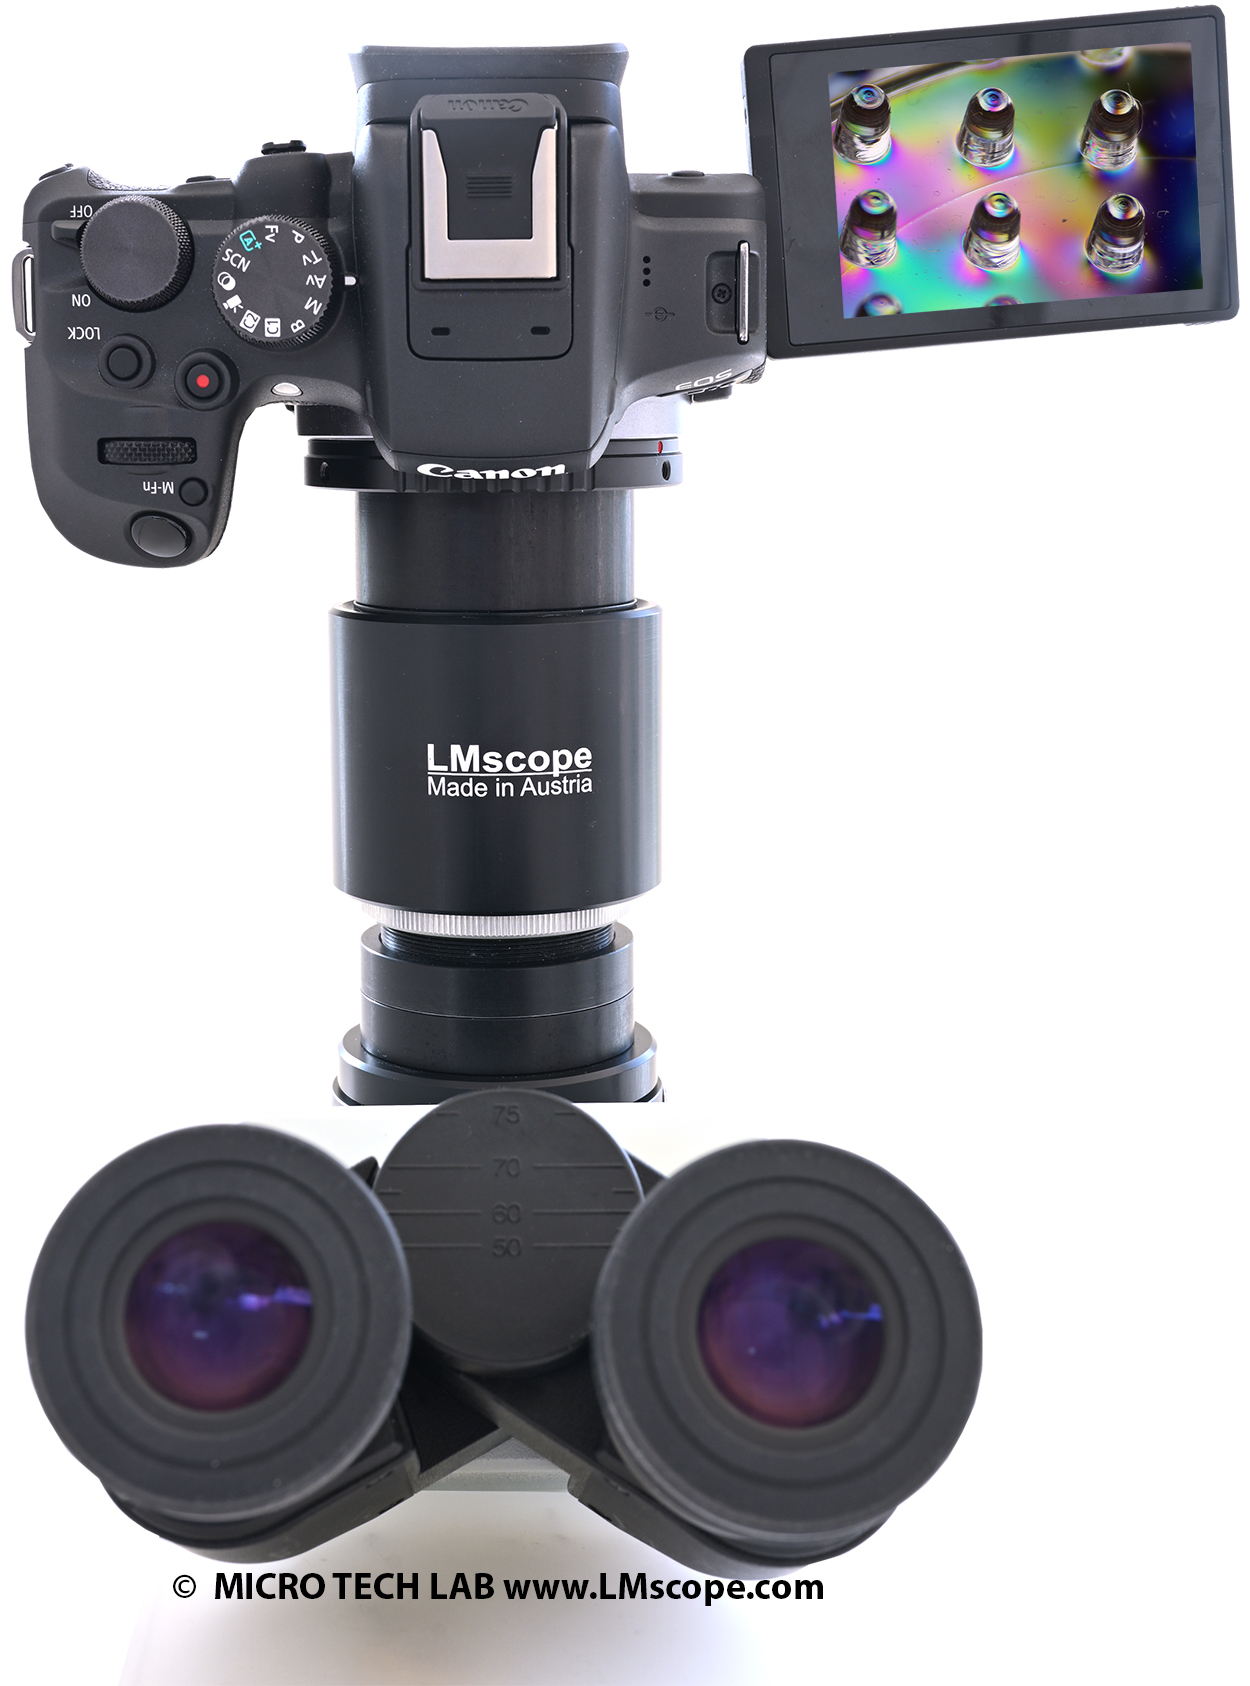
We offer versatile adapter options for both phototubes and eyepiece tubes. With our adapters, Canon EOS cameras can be connected to virtually any microscope, enabling the creation of outstanding microscope images with the EOS Utility software. Manufactured in Austria, our LM microscope adapters provide a reliable, secure connection with excellent optical quality. They also feature integrated precision optics for superior image quality.
Conclusion: Canon’s EOS Utility 3 software makes using Canon EOS cameras for microscope work a lot easier. The software significantly enhances image quality and operational efficiency, and the eyedropper tool makes white balance a one-click job. The software, which can be downloaded free of charge from the Canon website and is available for Windows and Mac, transforms any Canon EOS camera into a high-end microscope camera.
03.04.2024