

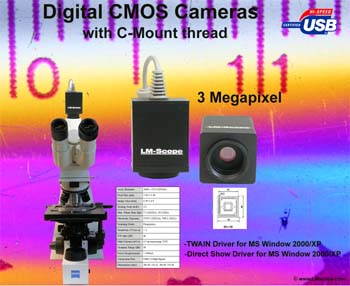
Using the VirtualDub 1.7 open source tool in microscopy to view and record videos with Microsoft™ Windows Vista
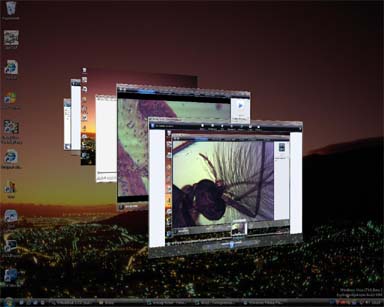
3D Desktop with Windows Flip 3D function
VirtualDub is a free program for capturing and editing videos. Using “Direct Show” drivers, videos can be recorded from any source directly onto the hard drive. Once recorded, VirtualDub can be used to edit the video sequence as desired. The program offers numerous functions and is simple to use.
The following short instructions describe how to record a film sequence from a video source onto the hard drive.
Instructions for recording a video sequence with the DivX 6.4 codec
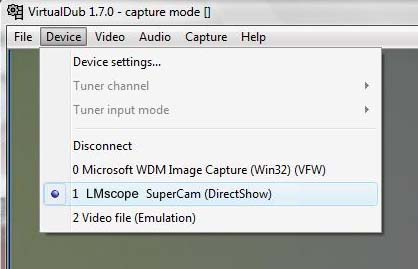
Use the “Device” menu to specify which video source is to be used. In this case, the high-resolution Lmscope USB C-mount camera is selected.
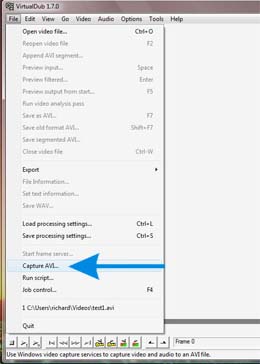
Choose “Capture AVI” to activate the recording mode in VirtualDub.
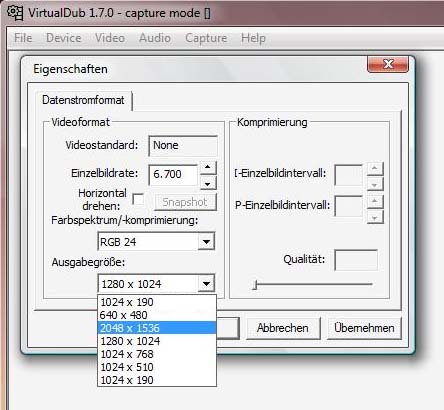
In the menu, choose “Video -> Capture Pin” to set the camera properties, such as frame rate, display size, etc.
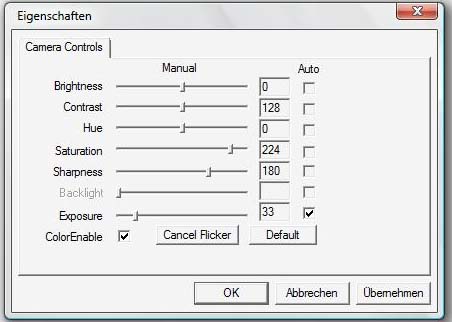
In the menu, choose “Video -> Capture Filter” to set camera image properties, such as brightness, contrast, etc.
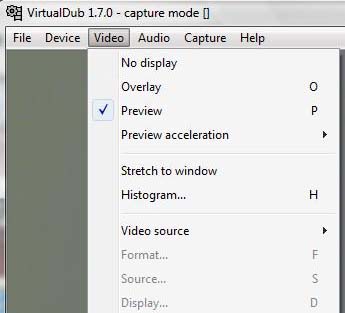
In the menu, select “Video -> Preview” to activate the settings, otherwise no live image is displayed.
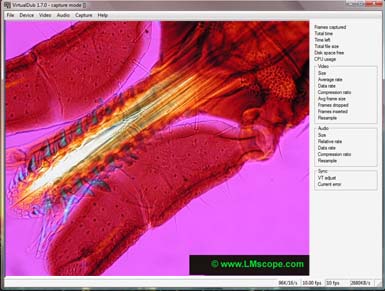
The preview image is then displayed.
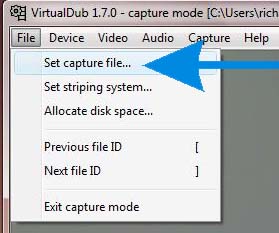
In the “File” menu, choose “Set capture file” to change the name of the video.
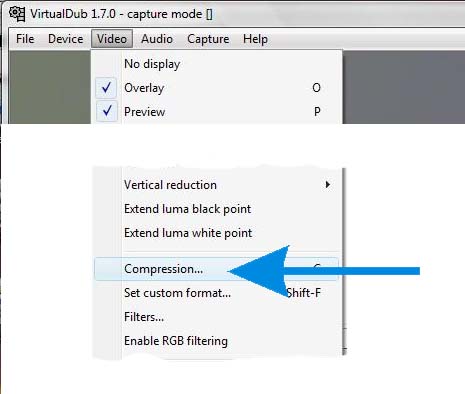
In the “Video” menu, choose “Compression” to select the video codec.
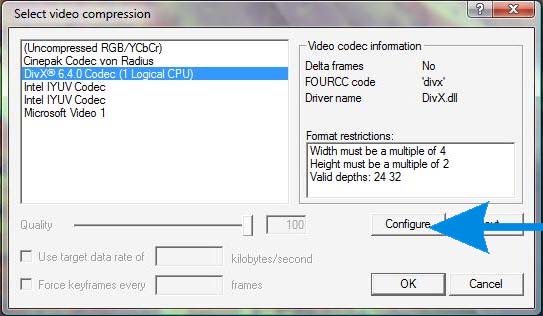
When selecting the DivX codec, more detailed codec properties can be set under “Configure”.

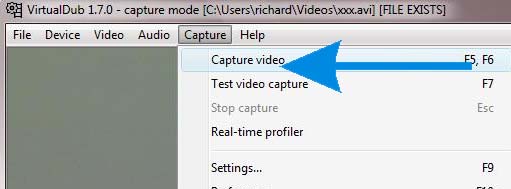
Choose “Capture video” to start the video recording.
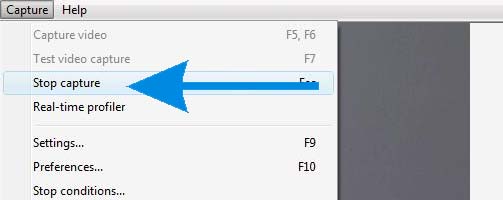
“Stop capture” ends the recording.
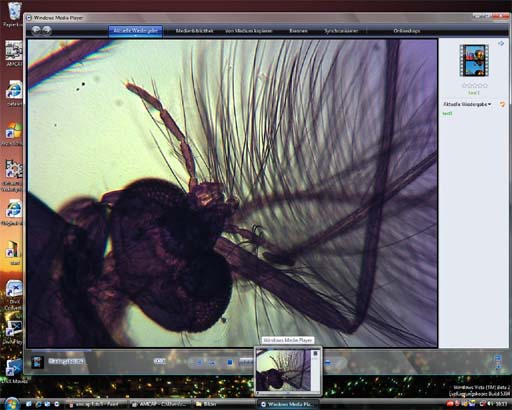
To check whether everything has worked properly, view the video sequence with a video player, such as DivX Player, Zoom Player or Windows Media Player.

New LM Digital Adapter for: Canon HR10 / Sony HDR-SR8 / Sony HDR-SR7 / Sony HDR-CX6 / Sony HDR-CX 11 / Sony HDR-SR 11 / Sony HDR-SR 1 / Sony HDR-HC7 / Sony HDR-SR5 / Sony HDR-HC5 / Sanyo XACTI VPC-HD1000 / Canon HF 100 / Canon HG 21 / Canon HG 20 / Canon HF 11 / Canon HF 10 / Sony HDR-HC 9 / Sony HDR-CX 6 / Sony HDR-HC3 / Sony HDR-SR1 / Sony HDR-HC1E / Sanyo XACTI VPC-HD1010 / Sony DCR-SR 210 / Canon HV 30 / Sony HDR-UX 19 / Sony HDR-SR 10 / Canon HG 10 / SonyHDR-UX 9 / Sony HDR-UX7 / Sony HDR-UX3 / Sony DCR-DVD 510 / Sony DCR-SR 75 / Sony DCR-HC 62 / Sony DCR-SR 55 / Sony HDR-FX 7 / Sony HDR-UX1 / Sony DCR-DVD 310 / Sony DCR-DVD 410 / Panasonic SDR-S 150 / Sony DCR-DVD 115 / Sony HDC-SD 100 /