

Explanation :Digital Camera Microscope Rating
Which digital camera functions best on a microscope?
This list is intended to simplify your search for the right digital camera. The main focus is placed on the camera functions required in microscopy. Using an optimal camera will significantly increase image quality and operating speed. We also have a little guide, that may help you finding the best suitable camera for your application.
Camera ranking for digital SLR cameras and compact cameras
Using digital cameras on a microscope puts particular demands on the camera.
Simply having a large number of pixels on the sensor chip is still no guarantee of high-quality microscope images. Only in combination with other relevant factors does a good sensor chip produce the optimal image quality.
1. Removable camera lens
2. Automatic exposure control without mounted original lens, e.g. T2 connection
3. LIVE VIEW, moving preview image on camera LCD
4. Number of sensor pixels
5. Mirror lock-up
6. Closable viewfinder
7. Moveable camera LCD screen
8. Remote control release (cable, infrared, or radio)
9.Full-frame sensor [24mm x 36mm]
10. HDMI videport
11. HD Videorecording
12. Full HD video mode 1920x1080 Pixel
13. Remote control software
14. Particularly suitable lenses in compact cameras and camcorders
15. Live View Magnifying Function
16. High Definition Live View on HDMI Port
17. ISO-value
18. Color depth
Camera evaluation
We have tried to be as neutral and objective as possible when evaluating the cameras for their optimal microscopy functions. Depending on their importance in microscopy, we have ranked the functions differently. The individual points were then added together to calculate a points total.
1. Removable camera lens
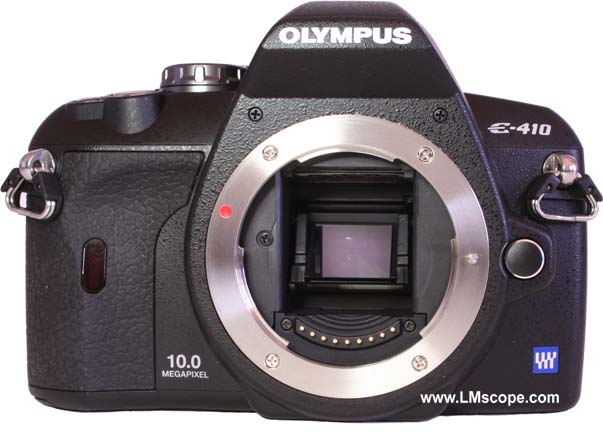
When using digital cameras on a microscope, it is a great advantage if the camera lens can be removed. Reducing all optical lenses in the light path of the microscope that are not absolutely essential for the microscopic image (this can be as many as 18 lenses) considerably increases the image quality.
In the case of SLR cameras, the lens can usually be removed. The LM digital DSLR adapter undertakes the mechanical and optical adjustments and generates an optimally lit, focused and high-contrast image. The resulting image quality is much higher than that of images taken with compact cameras and camcorders without removable lenses.
Using compact cameras is a particular disadvantage when running measurement programs on a computer. The fixed zoom lens on compact cameras makes it almost impossible to calibrate for length measurements, as the zoom setting of the lens cannot be reproduced precisely. This always results in a different total enlargement.
2. Automatic exposure control (Evaluation key: If yes 8000 points)
A fully functional automatic exposure control, even without the original lens being mounted, is particularly important when using a digital camera in microscopy. Some camera models do not accept any external lenses, the result being that attachments (such as bellows, telescope adapters and LM digital adapters) cannot be used, despite a standard original T2 connection.
Some digital camera models only have a manual exposure mode, which, for most microscopic work, can be very time-consuming. To gain optimal exposure with such cameras, an exposure bracket is necessary in almost all cases. Fortunately, many commercial digital SLR cameras have a fully functional automatic exposure control, which also operates with a T2 connection, without the original lens being mounted. These digital SLR cameras are equipped with a program automatic feature, which usually is well-suited for microscopy and results in a form of automatic aperture control with a T2 connection, without the necessity of having the original lens mounted. Of course, it is preferable to use the automatic exposure control with aperture preselection. If the automatic aperture mode is activated, the microscope images will inevitably be incorrectly exposed. When using a T2 connection, on the other hand, an open aperture is always simulated, and therefore images are automatically exposed with the correct shutter time. Necessary adjustments to the exposure can most easily be made using the exposure compensation button (+/-) or after switching to the shutter speed preselection mode (= automatic exposure control with shutter speed preselection). Unfortunately, there is still no digital SLR camera with auto exposure bracketing that is optimal for microscopy. This function would further simplify the optimal exposure management.
The selection of the metering mode (spot metering, integral metering or multiple-field metering) is dependent on the respective digital camera model and the subject to be captured. Generally speaking, all three metering modes produce good results for most microscopic specimens with a normal contrast. In the case of dark field, polarisation and fluorescence, spot metering or multiple-field metering will usually yield success.
Use of Nikon’s entry-level single lens reflex (DSLR) cameras at the microscope
Nikon economises with the automatic exposure control!
3. LIVE VIEW, moving preview image on camera LCD (Evaluation key: If yes 4000 points)
All compact cameras and some digital SLR cameras feature a “Live View” function. The real image is shown directly, i.e. “live”, on the camera display. For compact cameras, some of which are not equipped with optical viewfinders, this function is a matter of course. In the case of digital SLR cameras (DSLRs), this is currently (2007) rather the exception than the rule.
In standard DSLRs, the optical viewfinder is used to focus. Then, once the shutter button has been pressed, the image is shown on the LCD display. This means that only the images already captured can be viewed and evaluated. If a camera is mounted upright on a microscope, it is very inconvenient to use an optical viewfinder.
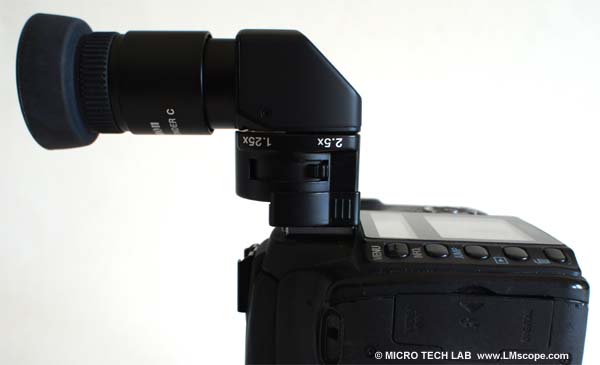
An optional right angle viewfinder or an optional attachable digital viewfinder makes matters slightly easier for SLR cameras. If the digital SLR camera is attached upright onto the microscope, then with some models of these digital viewfinders, the colour display does not point towards the microscope operator at a slight angle, as is desired, but unfortunately at an angle of about 15° upwards from the upright position. Only the very latest attachable digital viewfinders can be rotated or have a removable wired TFT colour display, which allows a comfortable, ergonomic work position. However, these digital viewfinders (ideally with a 2.5x magnification) cost the same as a moderately priced SLR camera!
Some digital SLR cameras, such as the Olympus E330, E410, and E510 models or the Canon EOS Mark III, are equipped with the Live View function. This makes it possible to check the image on the camera display before capturing the image and, where necessary, to refocus the microscope or select a different image composition. In the case of the Olympus E330, E410, and E510 models, it is also possible to view the moving Live View preview image with a 10x digital magnification and to focus the image precisely. This makes it possible to get the best possible image definition.
In most cases, a video output (PAL/NTSC) is also available, which can be used to display the Live View images on an external monitor.
4. Number of sensor pixels
In microscopy, it is not just the number of pixels that is responsible for the quality, focus and contrast of an image. The key influential factor in determining resolution power is the optics system used. The microscope lenses represent another important factor. Because a chain is only as strong as its weakest link, the optics system should always be comprised of components of the highest possible quality, which complement each other as optimally as possible.
|
5 to 9 Megapixel |
1000 points |
|
10 to 15 Megapixel |
2000 points |
|
>16 Megapixel |
3000 points |
To achieve the best quality in microscopic photos, it is recommended to use at least plan achromats. Plan fluors or plan apochromatic lenses are, of course, better still. The greater the zoom factor used, the smaller the influence of the digital camera’s number of pixels. Due to physical principles, a high number of pixels is an advantage for low magnifications and, in particular, photomacrographs.
5. Mirror lock-up (Evaluation key: If yes 2000 points)
Even minimal vibrations during the image capturing process will lead to a reduction in image quality. These motion blurs are mainly caused by the camera´s moving mirror and its mechanical shutter.
During exposure, the mirror on an SLR camera is flipped up. This clears the path of light to the curtain shutter and, once open, allows the sensor chip to be exposed. Unfortunately, the mirror is quite large. Flipping up the mirror thus causes vibrations which are transmitted throughout the entire system. These vibrations usually lead to camera shakes, resulting in a more or less significant reduction in the sharpness of the image. DSLRs that are optimal for microscopy feature a “mirror lock-up” function. Once the capture has been triggered, the mirror is first flipped up before the exposure takes place. In the case of some models, the delay between the mirror being flipped up and the curtain shutter opening can be set in seconds.
The mirror lock-up feature prevents vibrations, caused by flipping up the mirror, from occurring during the “sensitive” exposure period. This camera function significantly improves the quality of photomicrographs.
Some camera manufacturer have developed models which avoid vibrations caused by moving mirrors:
- Cameras with an interchangeable lens mount system and no mirror (e.g. Sony NEX, Olympus PEN)
- Cameras with seperate motors for the mirror and shutter (e.g. Canon EOS 5D Mark II + III, Nikon D7000, Nikon 7D etc.)
- Cameras with a translucent mirror (e.g. Sony Alpha)
This point is irrelevant for all camcorders and compact cameras because, in contrast to SLR cameras, central shutters do not result in motion blurs due to camera shakes.
[Further information on mirror lock-up]
6. Closable viewfinder
Microscope images produced with DSLRs that are optimally suited for microscopes are usually evaluated on the camera’s LCD screen without using the optical viewfinder. This makes it necessary to close the cover on the viewfinder by turning the viewfinder shutter lever. If this is not the case, ambient light will infiltrate the viewfinder and distort the results of the exposure measurements. The consequence is photomicrographs that are incorrectly exposed. This effect has driven many microphotographers to sheer desperation. Fitting a piece of lightproof black material over the viewfinder can temporarily prevent ambient light infiltration.
7. Moveable camera LCD screen (Evaluation key: If yes 1000 points)
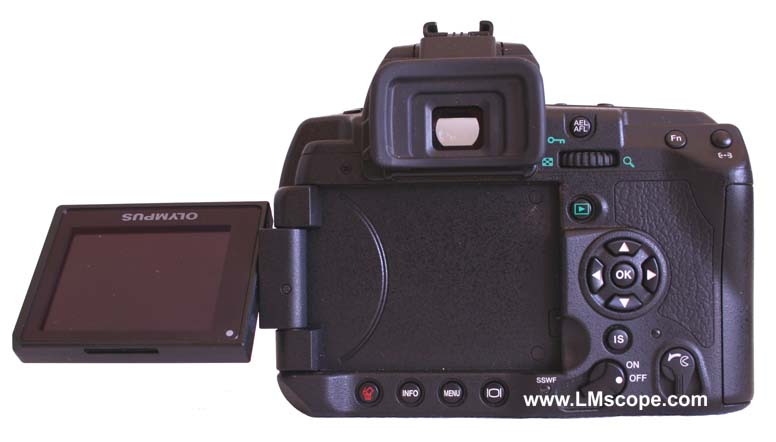
In photomicrography, the photographer usually sits in front of the microscope with the digital camera mounted on top. It is extremely uncomfortable if the photographer is forced to stand up and look at the immovable camera LCD or through the optical viewfinder in order to check the display window and/or the image composition.
A digital SLR camera with a moveable camera LCD is therefore optimal for microphotography. If the LCD screen is adjusted so that the display points slightly towards the microscope operator (the optimal angle), the image can easily be viewed and assessed from a sitting position. Alternatively, when using immovable camera LCDs, the image can be viewed on an external monitor. A PAL/NTSC video output is integrated in many digital cameras, and an AV cable is a standard piece of equipment. Using a graphic card, a computer screen can also be turned into a video monitor.
8. Remote control release
Image definition can easily be improved by using a remote control release. Remote control releases are usually included with the basic equipment of a digital camera. Depending on the camera model, remote control releases operated by cords, infrared and, more rarely, radio, are also available in retail stores. If no remote control release is used, images inevitably end up being out of focus due to camera shakes. This motion blur is characterised by indistinct double structures throughout the entire image.
If no remote control release is available, the somewhat cumbersome self-timer function can, at a push, be activated.
9. Full-frame sensor [24mm x 36mm] (Evaluation key: If yes 2000 points)
If microscope photos of extraordinary high quality are important to you, then you should always choose a digital SLR camera with a full-frame sensor. It should be mentioned, however, that cameras with a half-frame sensor or a four-thirds chip can also provide very good results.
Using full-frame digital SLR cameras in microscopy Micro-Tech-Lab Newsletter from 20.11.2008
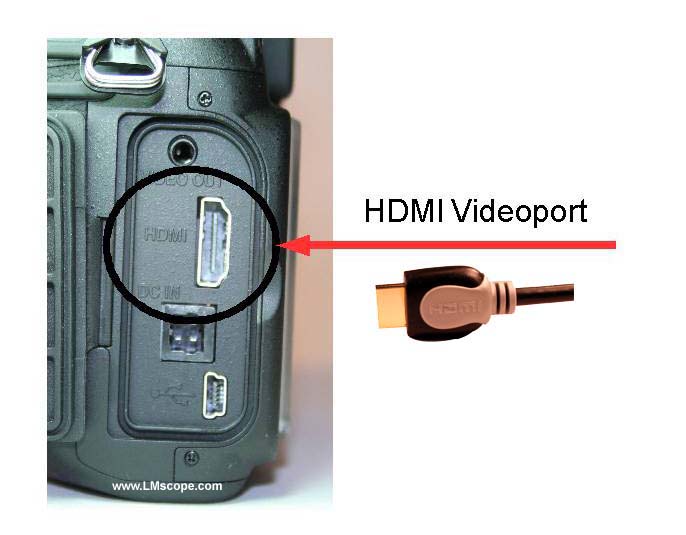
10. HDMI videport (Evaluation key: If yes - 1000 points)
The old analogue AV video interface with the PAL/NTSC standard has been superseded by the new high-definition multimedia interface (HDMI). Through digital transmission of the video and audio information, quality is improved many times over. With full HD cameras, a resolution of 1920x1080 pixels is achieved.
Analogue video output (AV) versus the digital HD output (HDMI) of digital cameras (digicams)
11. HD Videorecording (Evaluation key: If yes 1000 points)
The camera offers the possibility of saving video sequences in HD quality (1280x720 pixels) on the memory card.
Are HD single lens reflex cameras the better HD camcorders?
USB (universal serial bus) video cameras in microscopy – quite simply far too slow!
12. Full HD video mode 1920x1080 Pixel (Evaluation key: If yes 500 points)
Modern digital compact cameras and SLR cameras are able to record video sequences to the memory card in HD quality (1920x1080 pixels).
13. Remote control software (Evaluation key: If yes 8000 points)
Using a connection to the computer, mainly via USB2 cable or LAN/WLAN (WiFi), the camera can be remotely controlled from the computer. Without touching the camera, all settings and image resolutions can be configured from the PC. After the image is taken, it can be saved to the computer and immediately assessed on the screen. Thanks to this separation of functions, vibrations that arise when taking an image manually can be avoided (see point 8: “remote control release”).
Newer camera models as the Canon EOS 600D can stream the Live VIew image to the computer via a USB2 cable. The images and videos can be seen on the PC monitor without delay. For more detailed information read our test report:
Canon_EOS_600D_on_microscope_en.html
Controlling Olympus digital SLR cameras from your PC with the OLYMPUS Studio 2 software
Nikon Camera Control Pro 2 software: A milestone in digital microscopy and microphotography – the Nikon D300 and D3
14. Particularly suitable lenses in compact cameras and camcorders
Basically, digital SLR cameras are preferable to compact cameras. In compact cameras, the lens forms a solid unit with the camera body and cannot be removed. The high number of optical lenses constituting the zoom lens makes the adaptation between microscope and camera difficult and reduces the image quality. Read more about the use of compact cameras in microscopy on our website.
Some compact cameras / camcorder have camera lenses which can be quite good adjusted onto microscopes. Simple constructions with few optical lenses provide better results. Exceptions are compact cameras with small lenses with fixed focal lengths. They have a maximum of three lenses and that´s why they are best suited for working on microscopes in the group of compact cameras.
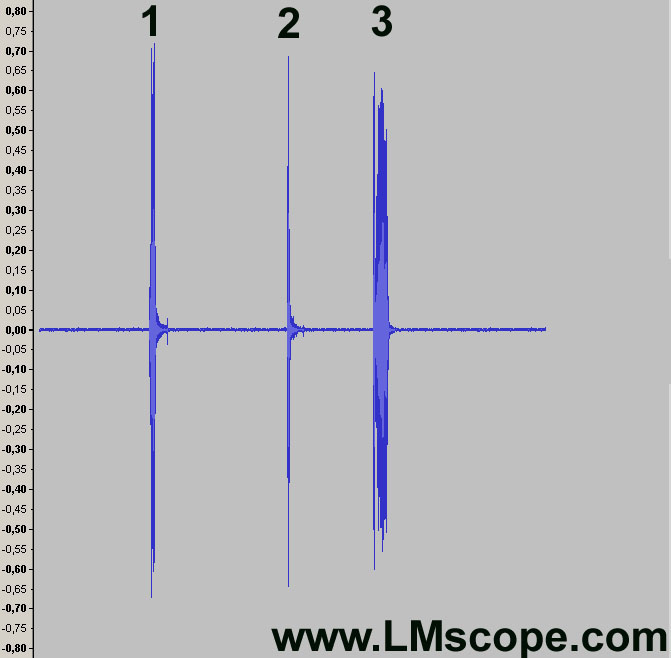
15. Live View Magnifying Function (Evaluation key: If yes 5000 points)
Some compact cameras/camcorders are equipped with a magnifying function in Live View mode. This can be used to focus details more exactly.
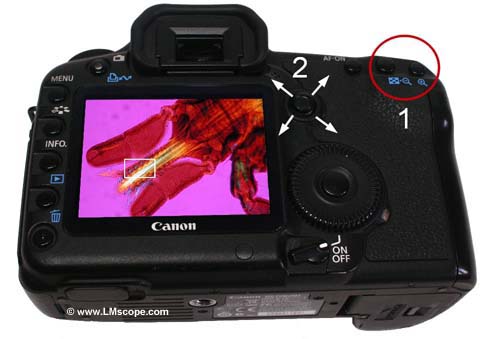
To do this, activate the Live View mode and then select the magnifying function (1). Focus the part of the microscope image with the Multi-Controller (2), you want to magnify. Unfortunately it´s not possible to adjust the focus with every camera model. Some camera models just focus the center of the image.

Now you can see on your display the magnification function symbol. Choose the requested magnification. Focus the picture and release the shutter.
16. High Definition Live View on HDMI Port (Evaluation key: If yes 1000 points)
Some cameras offers the possibility of displaying a Live View picture directly on an HD-capable monitor or even a projector (for lectures and talks) via the HDMI interface. This is particularly advantageous if several persons are working together and discussing the slide.
17. ISO values
|
6.400 to 12.799 ISO |
2000 points |
|
12.800 to 25.599 ISO |
4000 points |
|
> 25.600 ISO |
6000 points |
The ISO value describes the light sensitivity of camera sensors. The higher the ISO speed number, the higher the sensitivity to light. When the sensitivity is raised (and the ISO figure is increased), photography will become possible even in dark locations, but the image will appear more pixelated (grainier) due to noise. The use of high ISO speed n umbers is only recommended with high-quality sensors.
18. Colour depth
Colour depth describes the maximum number of colours available to represent a single pixel in an image. In the RGB colour system, each image point is generated from each of the three colour channels (red/green/blue). With 12 bits per channel, for example, there are 4,096 combinations for each colour channel. For all three colour channels the bit depth translates to 36 bits of colour information per pixel, which allows for a total of 68,719,476,736 possible colour combinations. Depending on the camera model, the colour depth mostly ranges between 24-bit and 42-bit RGB.
|
36 bit |
4000 points |
|
42 bit and more |
6000 points |
Which digital camera works best on a microscope? [List of cameras]
New LM Digital Adapter for: Sony Alpha 9 III / Sony Alpha 7R VI / Nikon Z9 / Nikon Z8 / Sony Alpha 7R V / Sony Alpha 1 II / Sony Alpha 1 / Sony Alpha 9 II (ILCE-9M2) / Sony FX3 Cinema Line / Sony Alpha 9 / Nikon D6 / Canon EOS R3 / Sony FX3 / Canon EOS R6 Mark II / Canon EOS R8 / Sony Alpha 7R IV / Canon EOS R5 II / Nikon Z6III / Canon EOS R5 / Sony Alpha 7S II / Sony Alpha 7S III / Sony Alpha 7R III / Canon EOS R6 / Nikon Z6 / Nikon Z6II / Sony Alpha 7R II / Nikon Z7 / Nikon Z7II / Canon EOS R / Canon EOS Ra (Astro) / Nikon Z5 / Sony Alpha 7C / Canon EOS RP / Sony Alpha 7S / Canon EOS R7 / Leica SL2-S / Canon EOS R10 / Nikon Z50 II / Canon EOS 1D X Mark III / Nikon Z50 / Nikon Z30 /